


There are several reasons to consider setting up a proxy on your iPhone.
- Privacy: Proxies conceal your IP address and make it so that websites or trackers cannot easily trace your online activity.
- Security: Some proxies add encryption layers to your browsing and provide extra protection, especially when using public Wi-Fi networks.
- Access Restricted Content: Certain websites and services are restricted based on your geographical location. A proxy server allows you to bypass these limitations.
- Improved Speed: Some proxies cache frequently visited websites and speed up your access.
Before Starting
Note: iOS only allows a proxy to be applied over Wi-Fi - it can't be applied to a cellular data connection.
Before learning how to set up a proxy, you'll need to know the basics. A reliable proxy provider is required to maintain security and performance.
Webshare is a highly reputable proxy provider with more than 245,000 customers worldwide that offers both free and paid proxies. For new users, Webshare provides 10 free proxies without needing to input any credit card details. This makes it the perfect starting point for beginners.
To get proxies from Webshare follow the steps mentioned below.
- Visit the Webshare website.
- Sign up for a free account.
- Once logged in, go to the "Proxy List" section, where you can see your free proxy list credentials.
With your proxies ready, you can now move on to setting them up on your iPhone.
How to Set Up a Single Proxy on iPhone
Follow the steps below to browse the internet via a proxy server.
1. Open your Wifi Settings
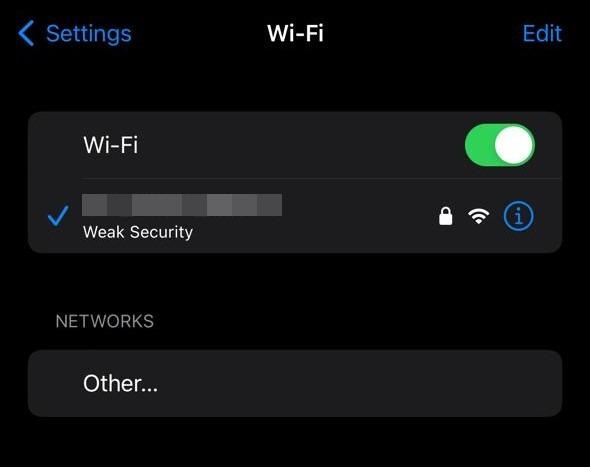
Click on the settings icon and go into your wifi settings. Make sure that you are connected to a wifi network. This wifi network will be used to connect to the proxy server.
2. Configure Proxy
As you have joined the wifi, click the information button next to your wifi network to configure it.

You will see a few options that you can modify within your Wifi network. First, let’s look for the option labeled “HTTP Proxy”. Under HTTP Proxy, you will see a setting to configure a proxy.
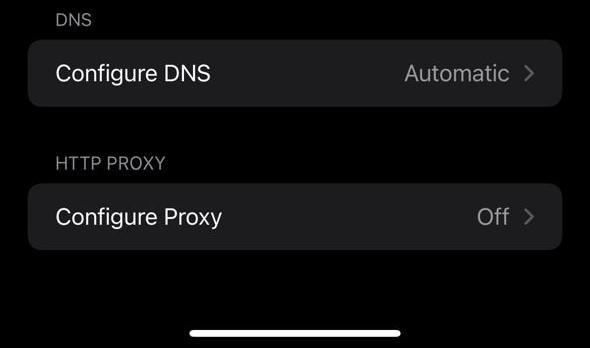
Click on it and you will have a drop-down list, with the selections "Automatic" and "Manual".
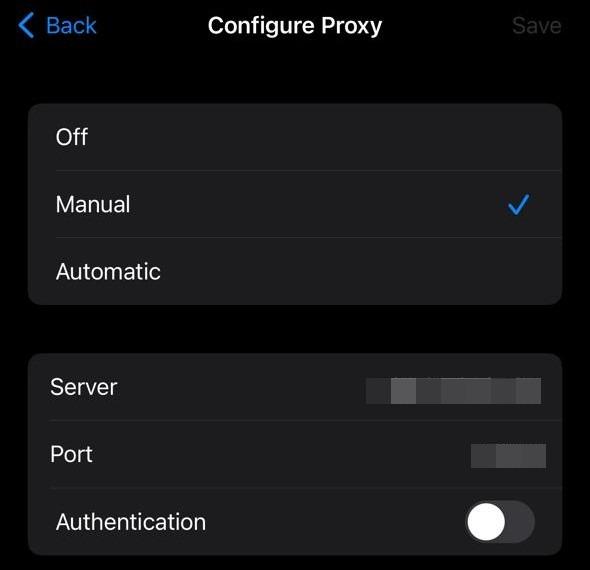
3. Manual setup
If you are new to using proxies, you should probably set up your proxy manually. When you click on the manual option, 2 input fields will appear for the server and port of the proxy server. In your Webshare dashboard, open Proxy List, then in the top-right set Connection Method to Backbone Connection - the default "Direct Connection" view uses a different credential format that won't work for manual proxy setup on iPhone.
You'll see the address p.webshare.io on port 80. This is the same for every proxy - only your username/password differ.
4. Authenticate
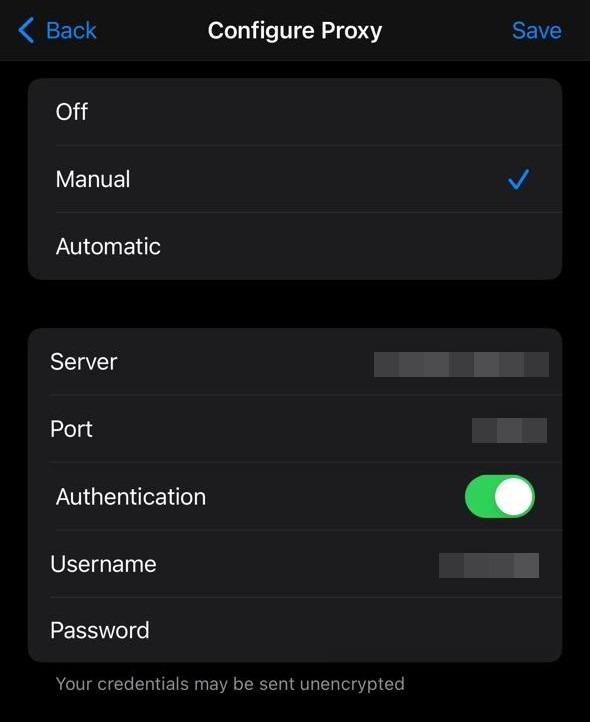
Below the proxy details, you will get an option which you can toggle called “Authentication”. This setting allows you to choose how you want to authenticate the proxy. Webshare gives you two options to authenticate your proxy connection. You can either use the “Username/Password” option or the “IP Authentication” option. This option is available right above the proxy list under the “Authentication Method” drop-down. The “Username/Password” option is chosen by default and generally it's easier to use for beginners.
If you are using the Username/Password method, you should toggle the “Authentication option” and they will request your username and password. These details will also be available on the proxy list page. Your username will have a number appended (e.g. abcdefg-1) - make sure to include it. Your password is the proxy password shown on the same dashboard row. Fill in these two credentials. Now, click save and you're good to go.
However, if you opt for “IP Authentication”, you can add your iPhone's IP address to the whitelist. This allows access without the need to enter your username and password in the browser for future browsing. Therefore there is no need to toggle the option for authenticating your proxy on your iPhone.

5. Test Proxy
Congratulations! You have now completed all the steps needed to configure a proxy with your iPhone. However, if you are not sure whether your proxy works or not, you can always visit a site like IPinfo which shows you the IP address you use to browse the web. You can view the IP address right after you create an account with them. If the IP address has changed that means the proxy is working. If it shows your iPhone’s normal IP address, you may have to try another proxy.
6. Start browsing
If you have made it this far, that means your proxy is working properly. All that's left to do is browse on your default web browser. This is because proxies only work with the default browser of your device. For iPhones, the default browser is normally Safari unless you have changed it already.
7. Turn off the Proxy
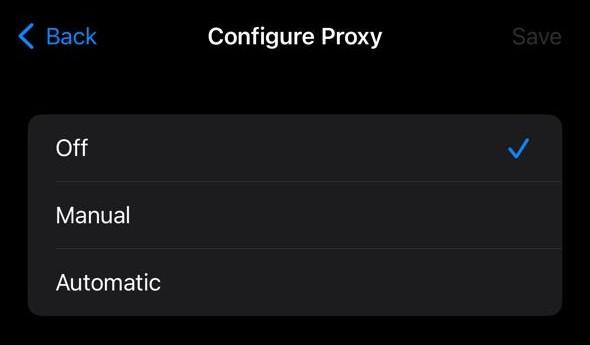
Once you have finished using the proxy, you can go back to the “Configure Proxy” option in your Wifi settings and turn it off. It’s worth knowing that certain iPhone apps can detect the proxy server connected to your device and deny the connection. In a situation like this, just disable the proxy and you can go on with your work. However, it won’t be a problem with web browsers.
Conclusion
We’ve reached the end of our guide on configuring proxies for iPhones. By following this guide, you now have the skills to configure a proxy server and enjoy secure, efficient browsing.
Before we go, here’s one last tip. Sign up for a Webshare account without needing a credit card and receive 10 free proxies. It's a valuable offer that’s worth your time, so don’t miss out on this great opportunity! Make the smart choice today.


