


Amazon is the world’s largest online retailer and it tracks user data to personalize recommendations and optimize its services. However, proxies help users mask their real IP addresses. Having an Amazon proxy on your device while shopping on Amazon helps you stay anonymous throughout your shopping experience.
Before starting
Before configuring a proxy with Amazon, the first step is to obtain access to some proxies. A great place to start is Webshare.io as it offers free proxies to its end users. You can sign up for a Webshare account and get 10 premium proxies.
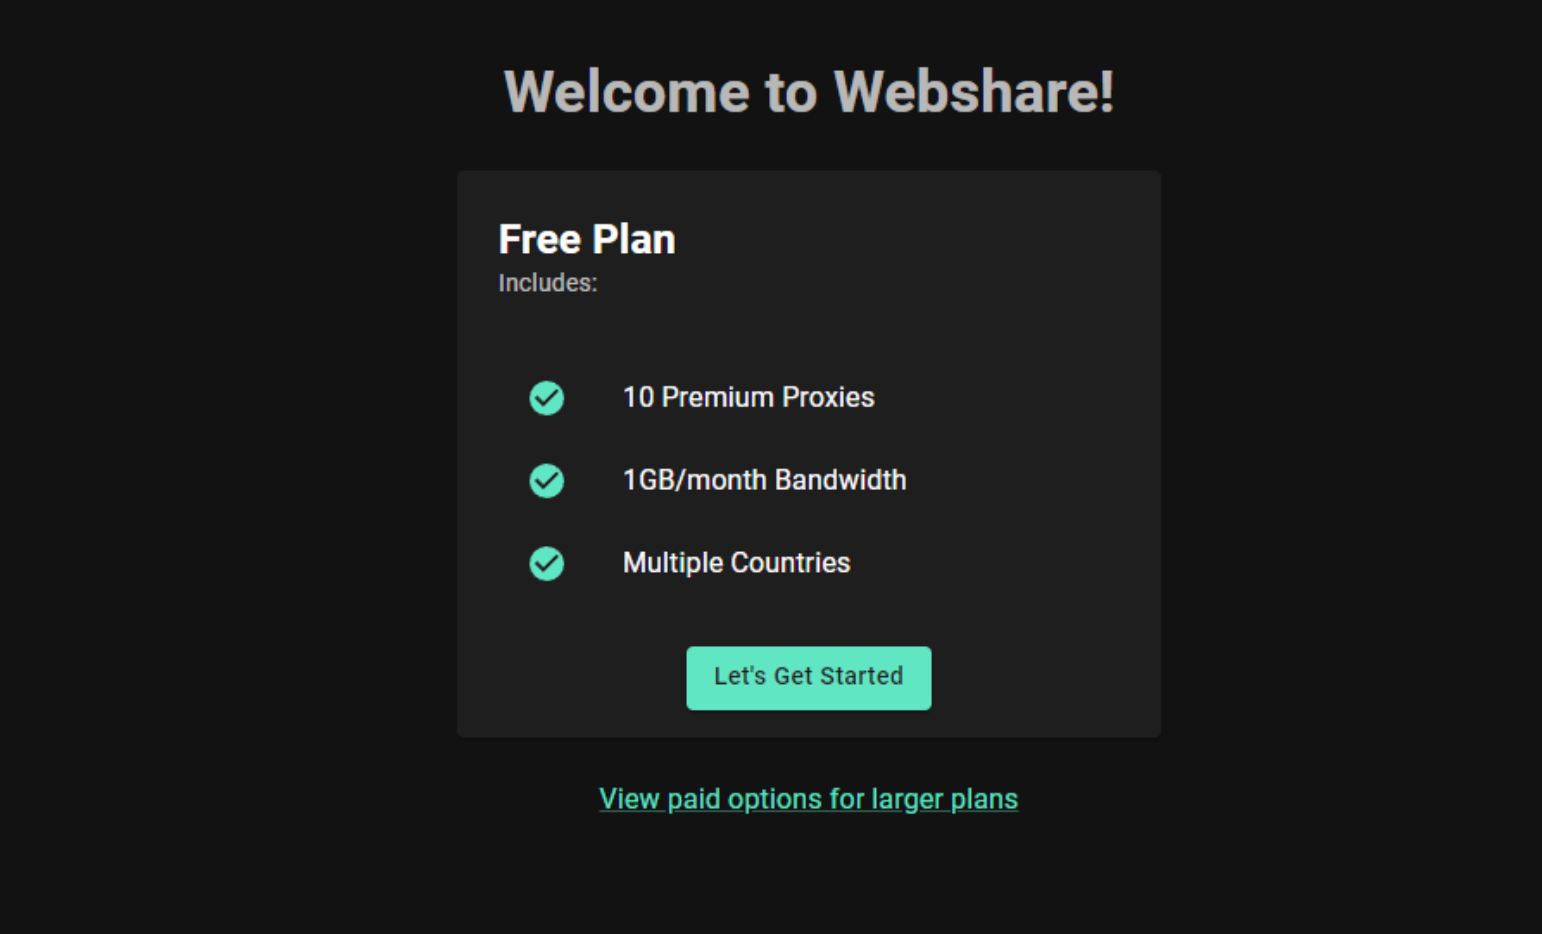
These proxies have 1GB of monthly bandwidth for zero cost. It’s not even necessary to provide user credit card details. Simply visit the Webshare website, create an account, and obtain your proxy details.
Easiest method: Amazon proxy for Chrome
Webshare Proxy Extension for Chrome is one of the simplest ways to set up an Amazon proxy. It eliminates the need for manual IP configurations and helps you to change your location in just a few clicks. Let’s see how to set this up with Webshare.
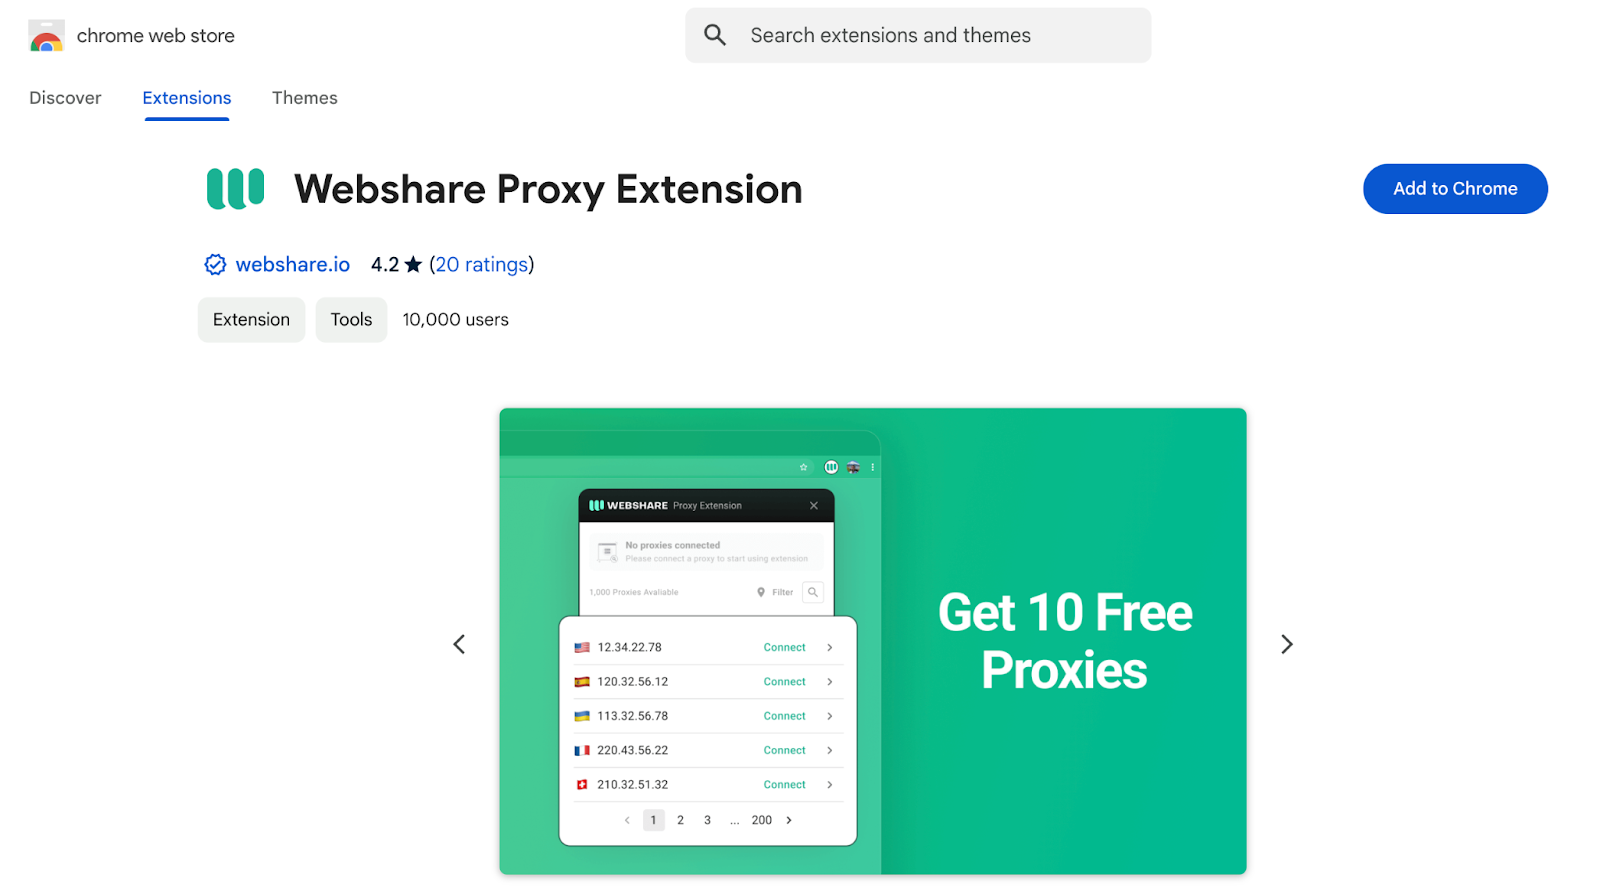
Step 1: Install Chrome proxy extension
Go to Webshare’s Chrome proxy extension download page and hit the “Add the extension for free” button. This will open the Google Chrome web browser and direct you to install the extension.
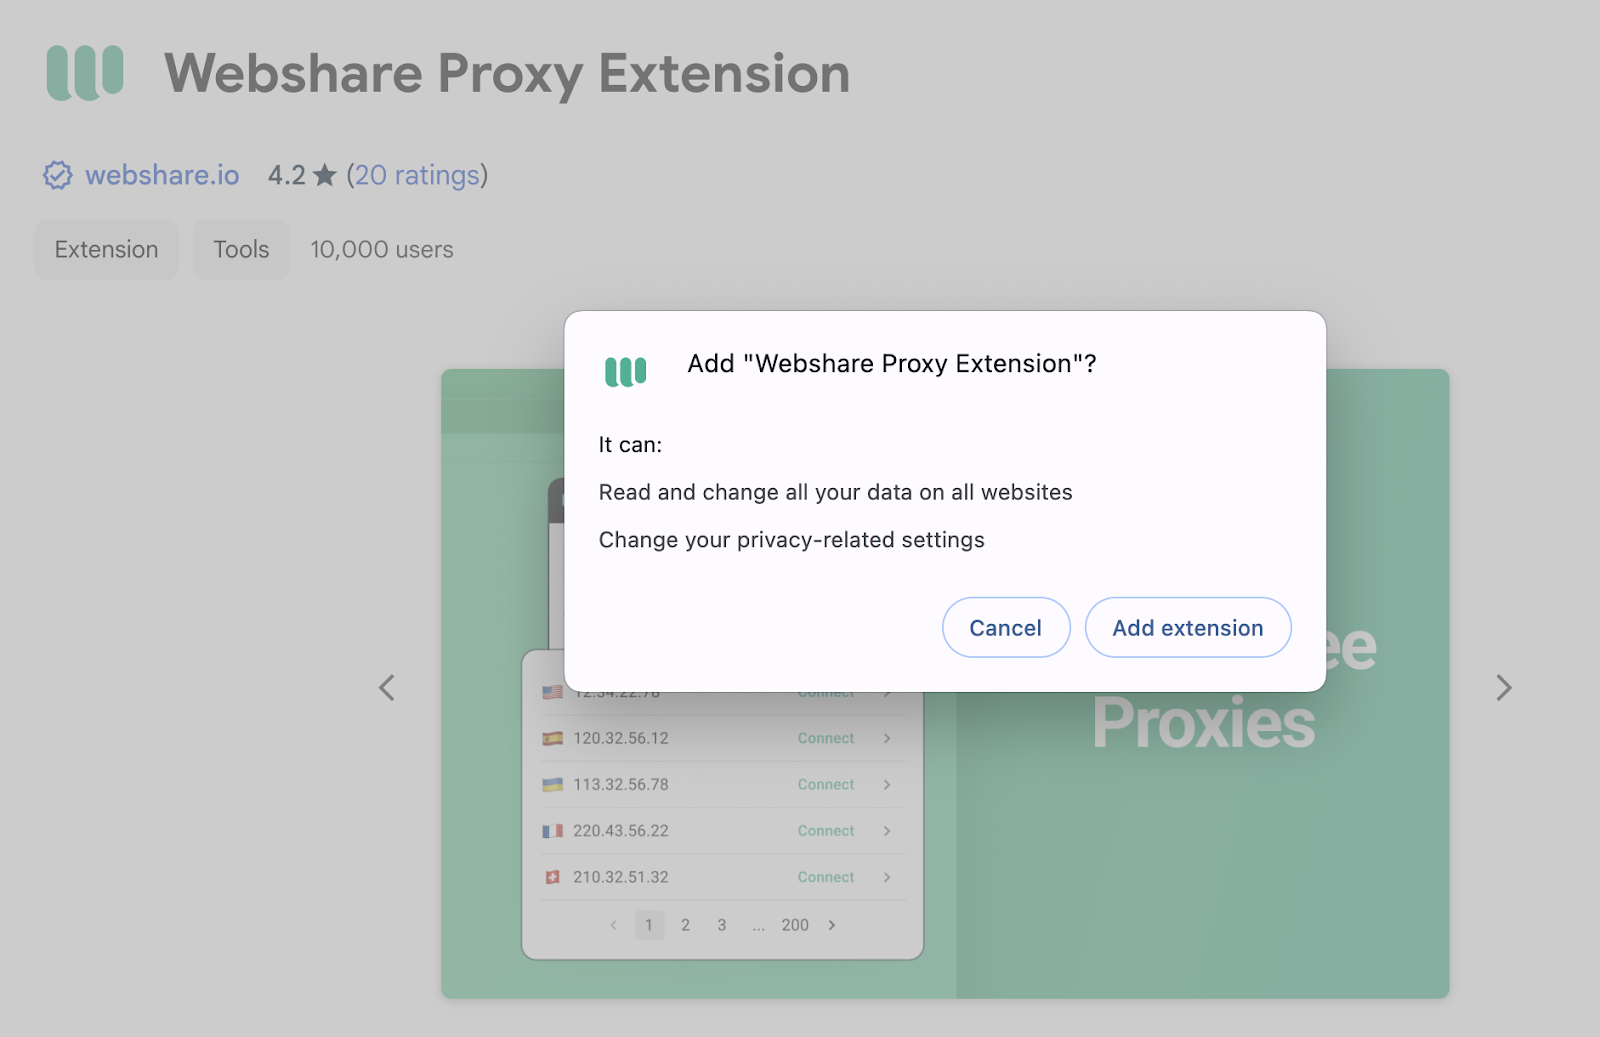
A confirmation popup will appear. There click "Add Extension" to complete the installation.
Step 2: Open proxy extension
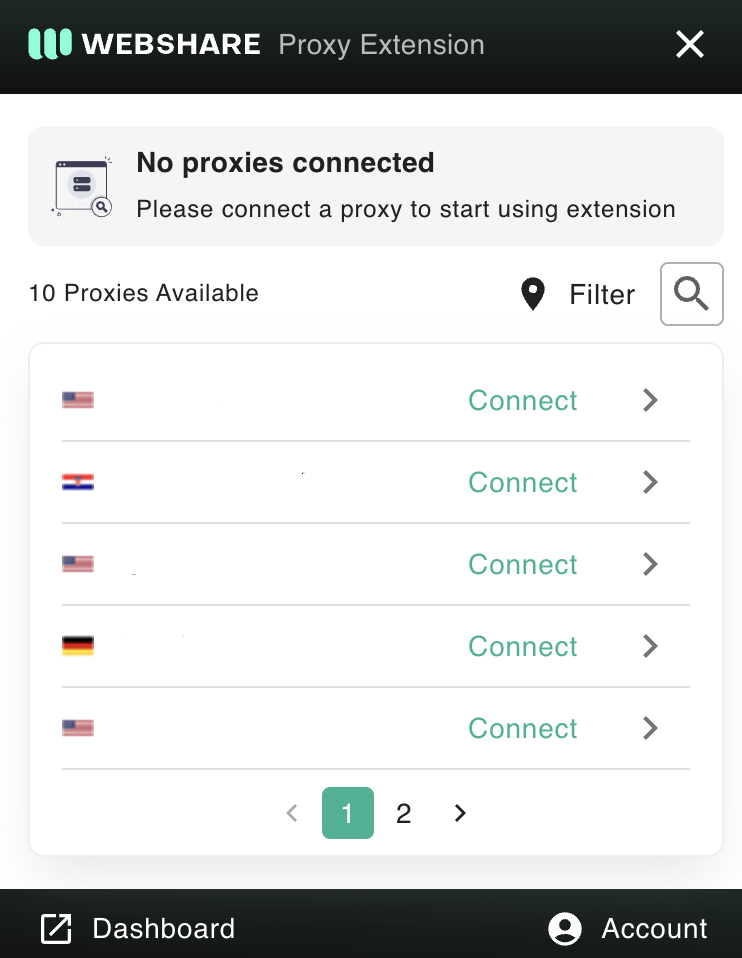
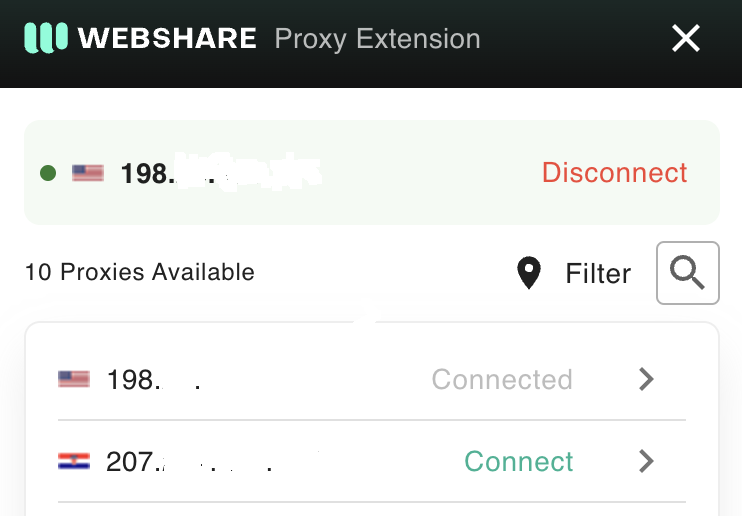
Once installed, you will see the Webshare icon in the Chrome extension toolbar. Click on it to open the extension.

Step 3: Log in to the extension
You won't need to log in again if you are already logged into your Webshare account using your Google Chrome profile, but just in case you have to - simply log in using your Webshare login credentials.
Afterwards, click on the Webshare extension name or icon and it will automatically list all available proxies from your account.
Step 4: Connect to the proxy
Browse through the list of available proxy servers displayed in the extension and select a proxy server that you prefer.
Click "Connect" to activate the proxy.
Now your Chrome browser is using the selected Amazon proxy, allowing you to browse Amazon with a different IP address.
Amazon proxy for Windows instructions
If you prefer to use a proxy to browse Amazon on your Windows machine, you can configure it directly in the system settings.
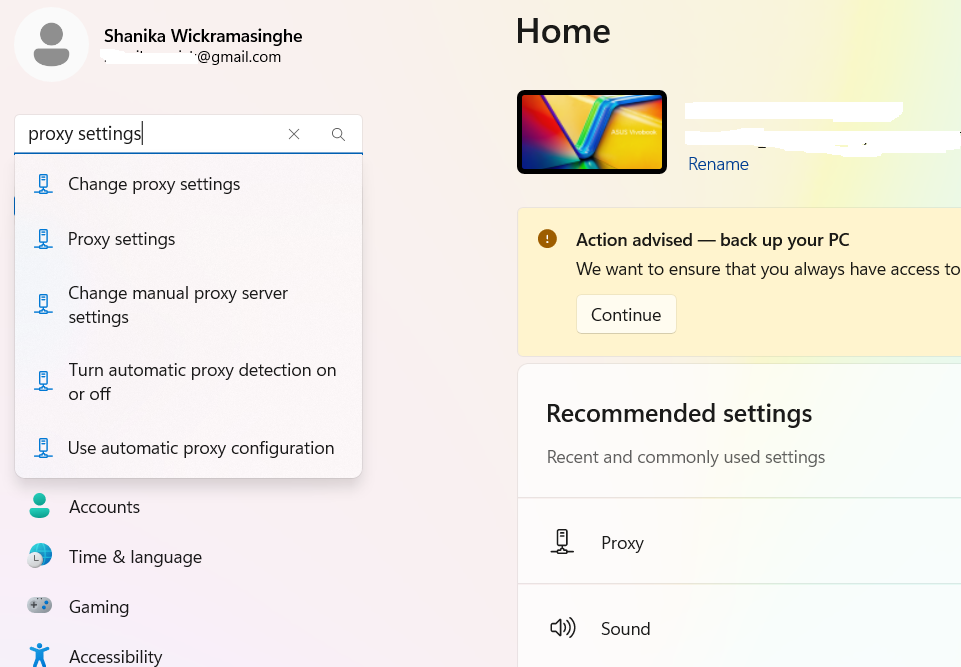
Step 1: Open Windows proxy settings
Click on the "Windows Start Menu". Then in the search bar type “Proxy Settings”. Once you receive the search results, click on it to open the Proxy Settings window.
In the proxy settings window, you will see two options.
- Automatic Proxy Setup - Windows will automatically detect and configure the proxy settings.
- Manual Proxy Setup - Enter the proxy IP address and port manually - this is the preferred option.
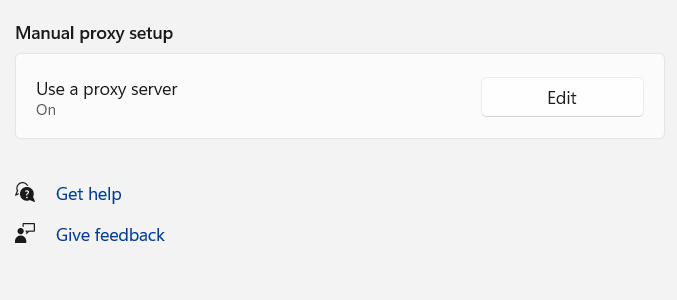
Step 2: Use Manual Proxy Setup
Turn on "Use a proxy server."
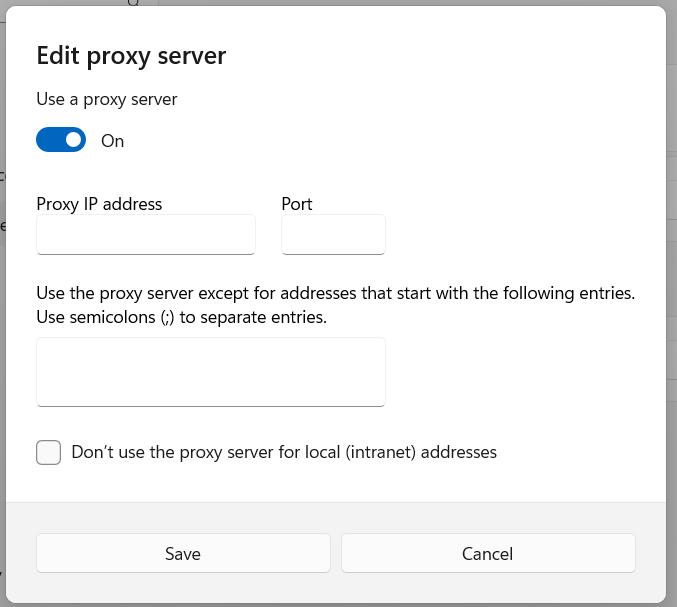
Step 3: Enter proxy details
Enter the proxy server address and port number provided by your proxy provider. If you have any websites that should bypass the proxy, enter their addresses in the designated field. Enable "Don’t use the proxy server for local (intranet) addresses" if you want local network access without the proxy.
Step 4: Click "Save" to apply the settings.
Once the settings are saved, your Windows PC will route all network traffic through the selected Amazon proxy. Now, when you open Amazon, it will recognize the IP address of your chosen proxy instead of your real location.
Amazon proxy for Android instructions
How you set up a proxy on your Android device can be different based on whether you're connected to a Wi-Fi network or on your mobile data. Below you can find more details on both methods.
Step 1: Wi-Fi Network proxy
If you're using a Wi-Fi network let's follow the below steps to get your proxy up and running.
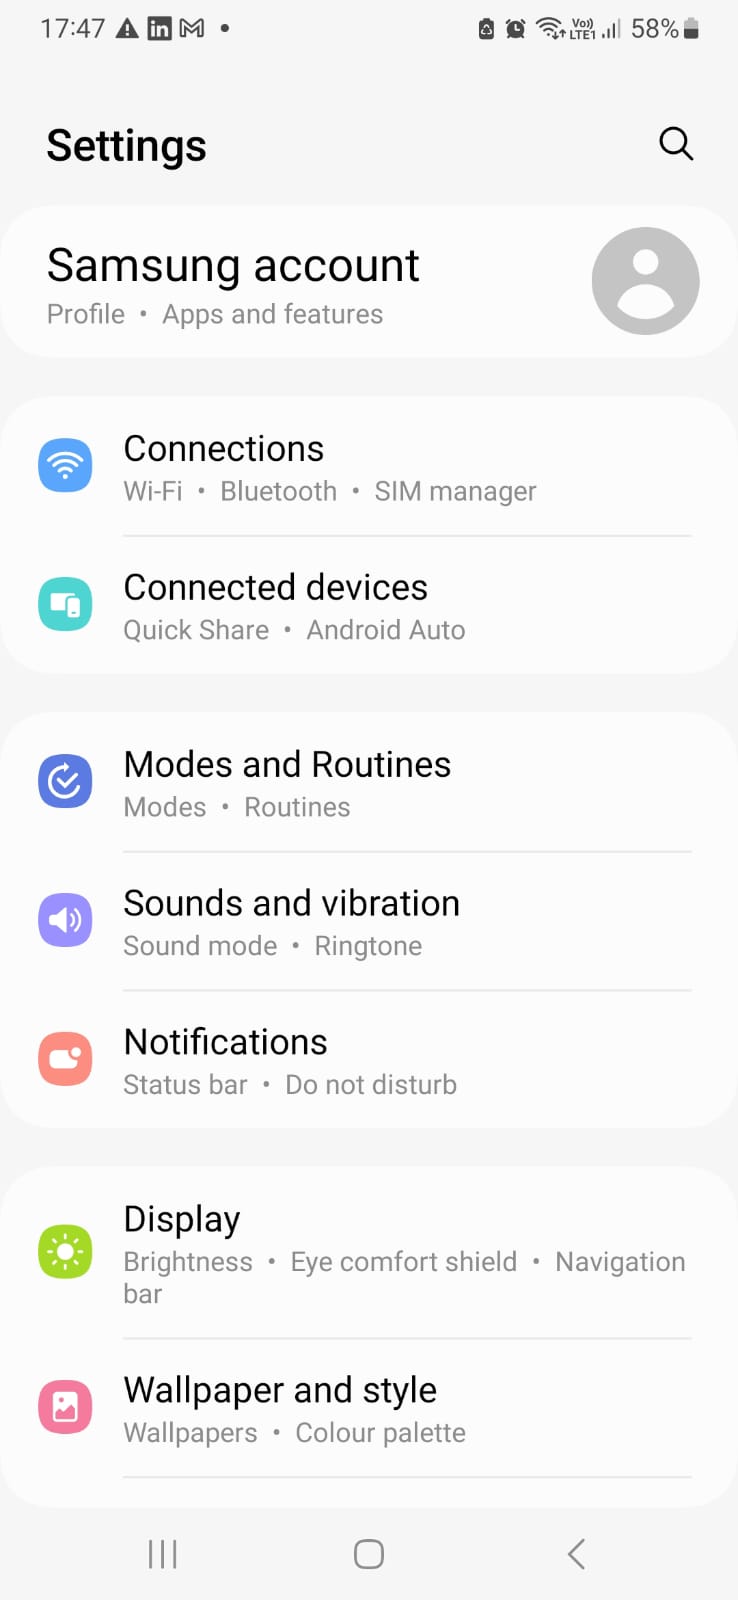
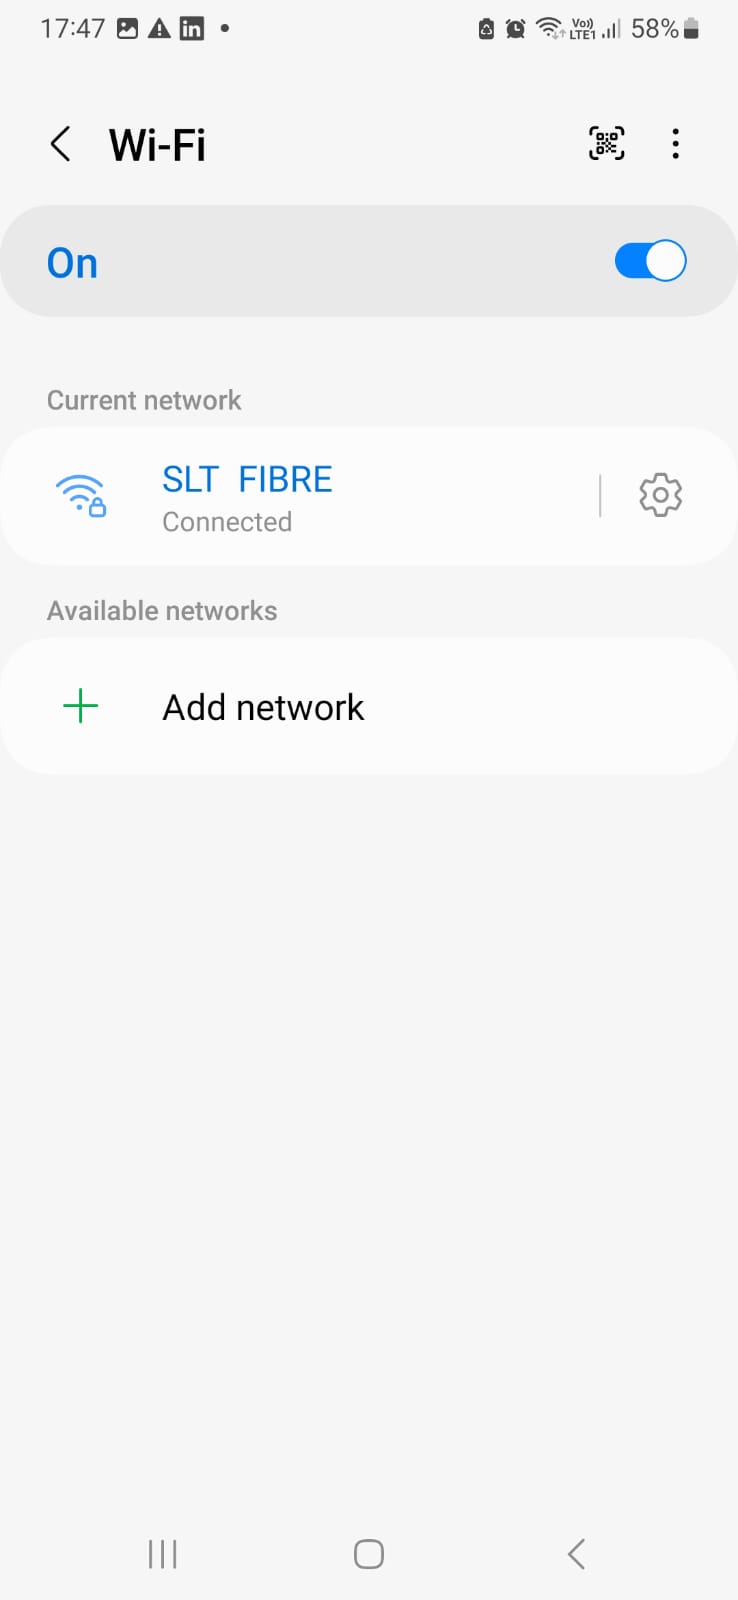
Open the Settings app on your Android device and then select "Connections" to view available WI-FI networks.
Step 2: Open Wi-Fi Settings
Select the Wi-Fi network that you wish to configure and press on top of its name for a few seconds.
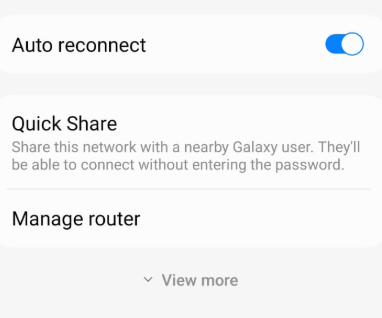
Tap the "Settings" icon.
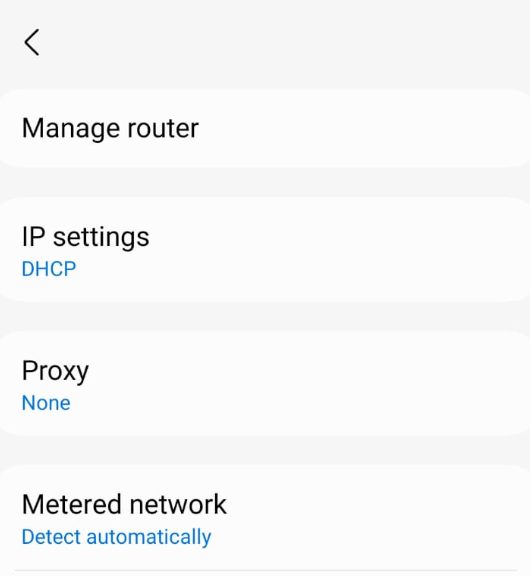
Then tap the drop-down “View more”.
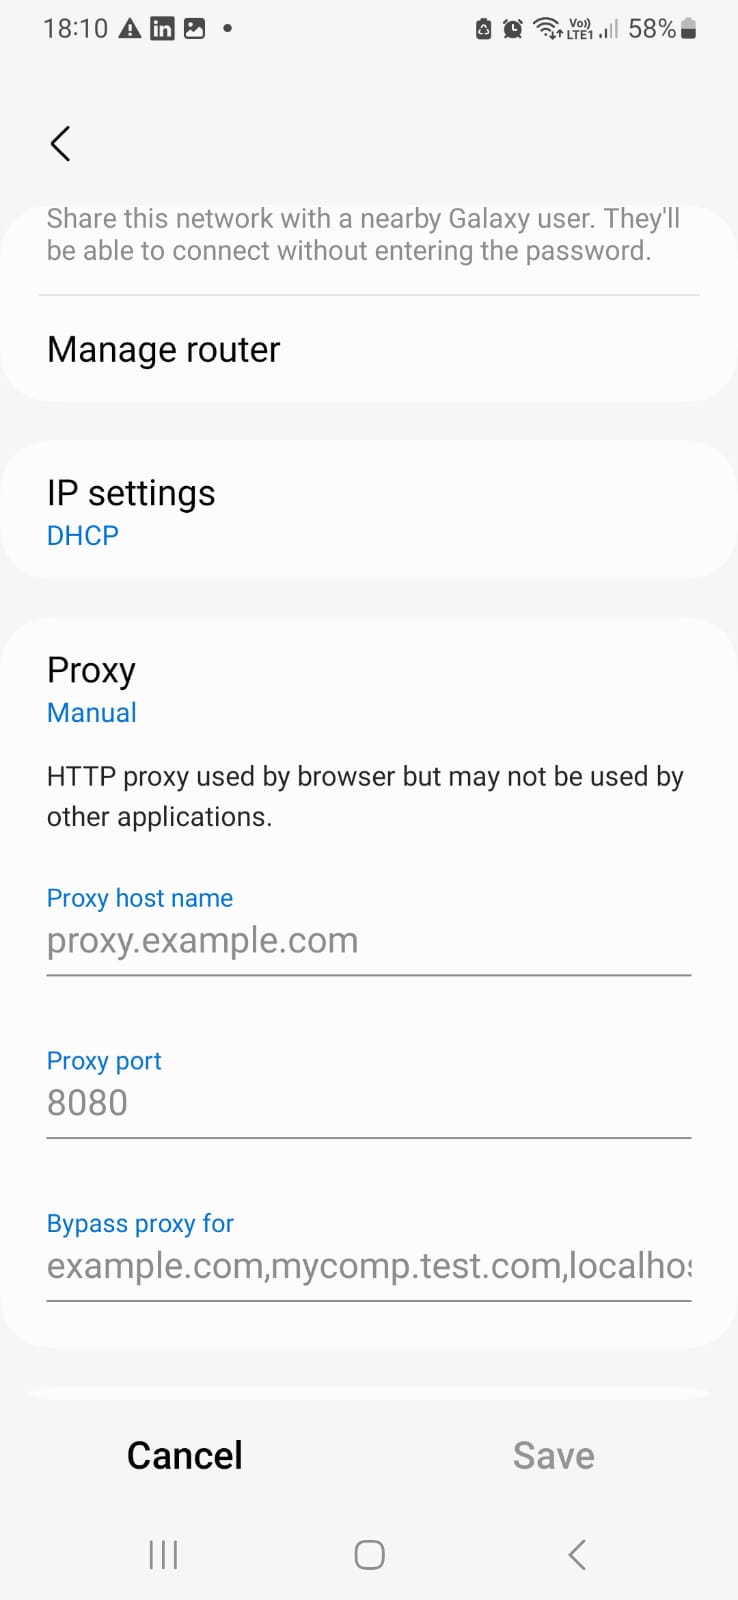
Step 3: Configure proxy details
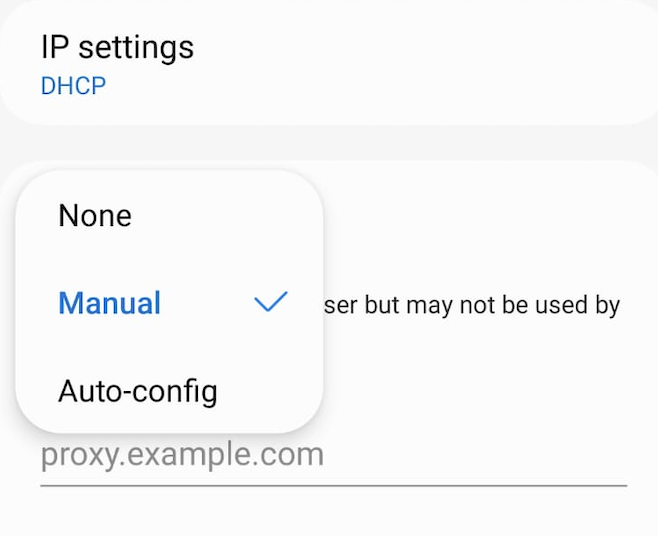
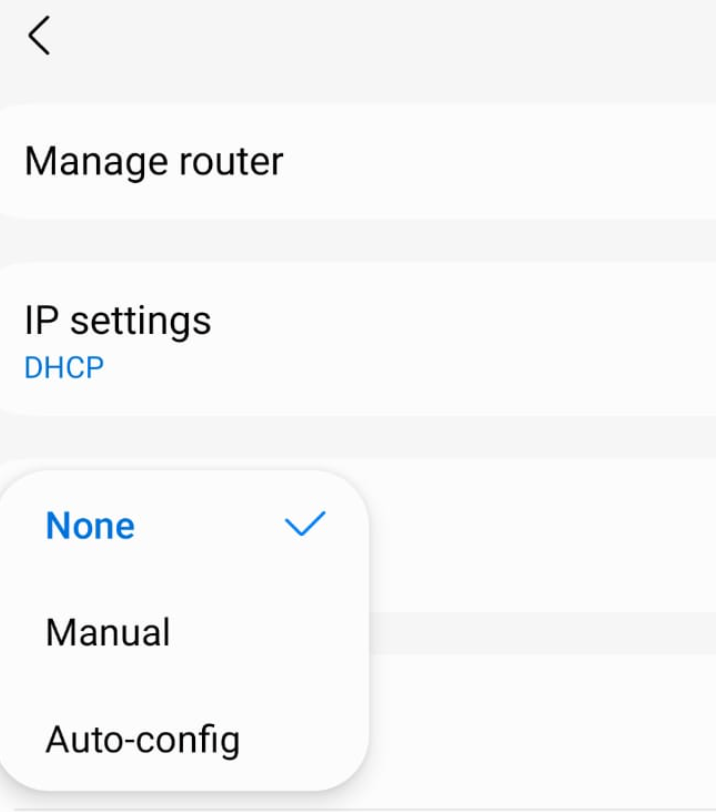
Tap the "Proxy" option, and you’ll see three choices.
- None - No proxy is used.
- Manual - Enter proxy details manually.
- Proxy Auto-Config - The system detects the appropriate proxy settings automatically.
Select "Manual".
Enter the proxy server address and the proxy port number provided by your proxy service.
If there are websites you want to access without using the proxy then enter their addresses in the "Bypass proxy for" field. If there are multiple addresses it should be a comma-separated list.
Example:- bypass1.com,bypass2.com
Step 4: Save proxy settings
Revalidate the details you entered and finally tap "Save" to apply the proxy settings.
Your Android device will now route traffic through the selected proxy when connected to this Wi-Fi network.
How to test if Amazon proxy is working correctly?
Once you have configured a proxy you should verify whether it's working correctly. There are multiple ways to test whether your connection is routed through the proxy.
- Open a web browser and go to a website like WhatIsMyIP. Note down your current IP address before enabling the proxy. Activate your Amazon proxy using the method you configured (Chrome extension, Windows settings, or Android settings). Refresh the WhatIsMyIP page and check if the IP address has changed. If the IP has changed, your proxy is working correctly. If the IP remains the same, review your proxy settings and try again.
- Another way that you can use to test this is to open Amazon’s website in a new browser tab. Then check if product prices, available items, or language settings have changed. This may indicate that Amazon is detecting a different location based on the proxy.
How to turn off Amazon proxy?
If you no longer need to use a proxy for Amazon you can disable the proxy using the steps below, based on your device.
1: For Chrome (Webshare Proxy Extension)
Click on the Webshare Proxy Extension icon in your Chrome toolbar and look for the "Disconnect" option.
2: For Windows
Click on the Windows Start Menu and search for "Proxy Settings.” and open the Proxy Settings window.
If you use Automatic Proxy Setup, turn off "Automatically detect settings" and "Use setup script." If you use Manual Proxy Setup, turn off "Use a proxy server."
3: For Android (Wi-Fi Proxy Settings)
Open the Settings app and tap "Wi-Fi." Then press the Wi-Fi network you configured with the proxy.
Tap the “Settings” icon, and then tap on “View more”. Under "Proxy", select "None" to disable the proxy.
What is the best proxy to use with Amazon?
If you use a proxy server on Amazon for personal browsing, static residential proxy will do the trick. For scraping and similar tasks, a regular datacenter proxy server could do the trick.


