


Crunchyroll, the leading anime streaming platform, offers an extensive library of legally licensed shows, movies, and simulcasts from Japan in multiple languages. With millions of subscribers worldwide, it's the go-to destination for fans seeking high-quality anime content through official channels.
However, due to international licensing agreements, much of Crunchyroll's content remains region-locked, leaving viewers unable to access certain shows in their country. Luckily, this guide will show you how to use proxy services with Crunchyroll on Chrome, Windows, and Android devices to unlock the platform's complete catalog, regardless of your location.
Before Starting
Before you begin this process, you need to get a set of proxies, as this is the cornerstone of this method. Thankfully, Webshare offers a convenient solution by providing 10 free proxies to anyone who creates an account. No credit card information is required; just visit the Webshare website, sign up, and get your proxy details instantly.
Now that you have access to reliable proxies, we can set up and use them on Chrome, Windows, and Android to bypass Crunchyroll’s regional restrictions.
Easiest Method: Crunchyroll Proxy for Chrome
One of the easiest ways to use a proxy for Crunchyroll on Chrome is through the Webshare Chrome proxy extension. The following steps provide a quick and efficient setup, ensuring seamless access to region-locked content:
Step 1: Install the Webshare Chrome Extension
Start by navigating to the Webshare Browser Extension page on your Chrome Web Store. Click Add to Chrome, and when prompted, confirm your installation by selecting Add Extension.

Step 2: Access the Extension and Create Your Account
After installation, you will likely not see the extension’s icon in the browser toolbar. In this case, there is a need to add it manually for easy access. To do this, go to the top-right corner of your browser and click on the Extensions menu, represented by a puzzle icon. From the list of installed extensions, locate Webshare and select the pin option.
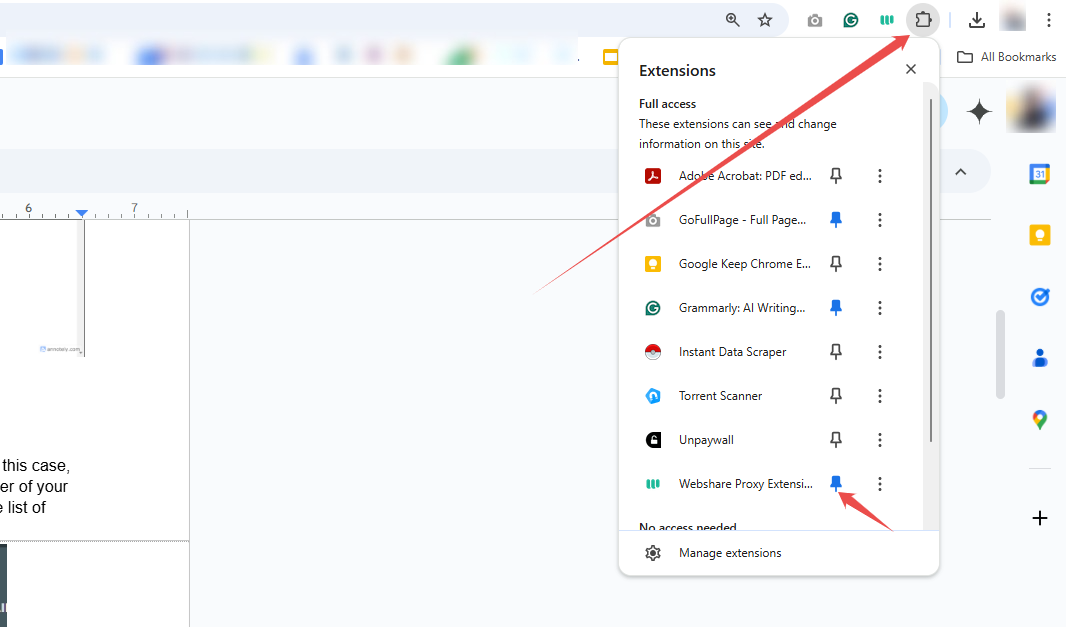
With this in place, click the Webshare logo to proceed. If you are an existing user, simply log in using your credentials. However, if it’s your first time, sign up by selecting Create Account. The registration process allows you to sign up using an email and password or conveniently link your Google account.
Step 3: Connect to a Proxy in Webshare
Upon logging in, you’ll see a message stating, “No proxies connected.” It’s no big deal; it simply means you haven’t selected a proxy yet. At this point, you are expected to use the 10 free proxies provided upon signup. Notably, each proxy has a flag and an IP address that shows its geographic location.

To connect, scroll through the list of free proxies and choose one that aligns with your needs. Click the Connect button next to the selected IP address, and the extension will instantly activate the proxy for you.
Step 4: Refine Your Proxies and Manage Connections
You can filter proxies based on country or IP address to get the best control over your proxy connection. Just click the Filter option in the top right corner of the Webshare interface to narrow down your options and choose the desired proxy.

After launching a connection, the proxy details will appear at the top of the extension, providing you with real-time information about your connection. You can easily switch between proxies or disconnect whenever necessary.
To ensure everything functions correctly, look for a green dot on the Webshare extension icon in your browser toolbar, indicating that your proxy is active and working correctly.
Crunchyroll Proxy for Windows Instructions
If you wish to route all your internet traffic through a proxy server instead of just Chrome, you can configure the proxy settings directly in Windows through the following steps:
Step 1: Head to Your System Settings
Start by accessing the system’s proxy settings. Simply open the Windows search bar, type Proxy Settings, and select Open from the search results. This will bring up the proxy connection page, where you get to set your connection up manually.
Step 2: Set Up Manually and Enter Your Webshare Proxy Details
From the Proxy Settings page, scroll down to the Manual Proxy Setup section. Switch on the corresponding toggle to enable the option to use a proxy.
Alt Text: Manual Proxy Configuration Settings on Windows

Before proceeding, return to the Webshare website and review the comprehensive list of your 10 free proxies.
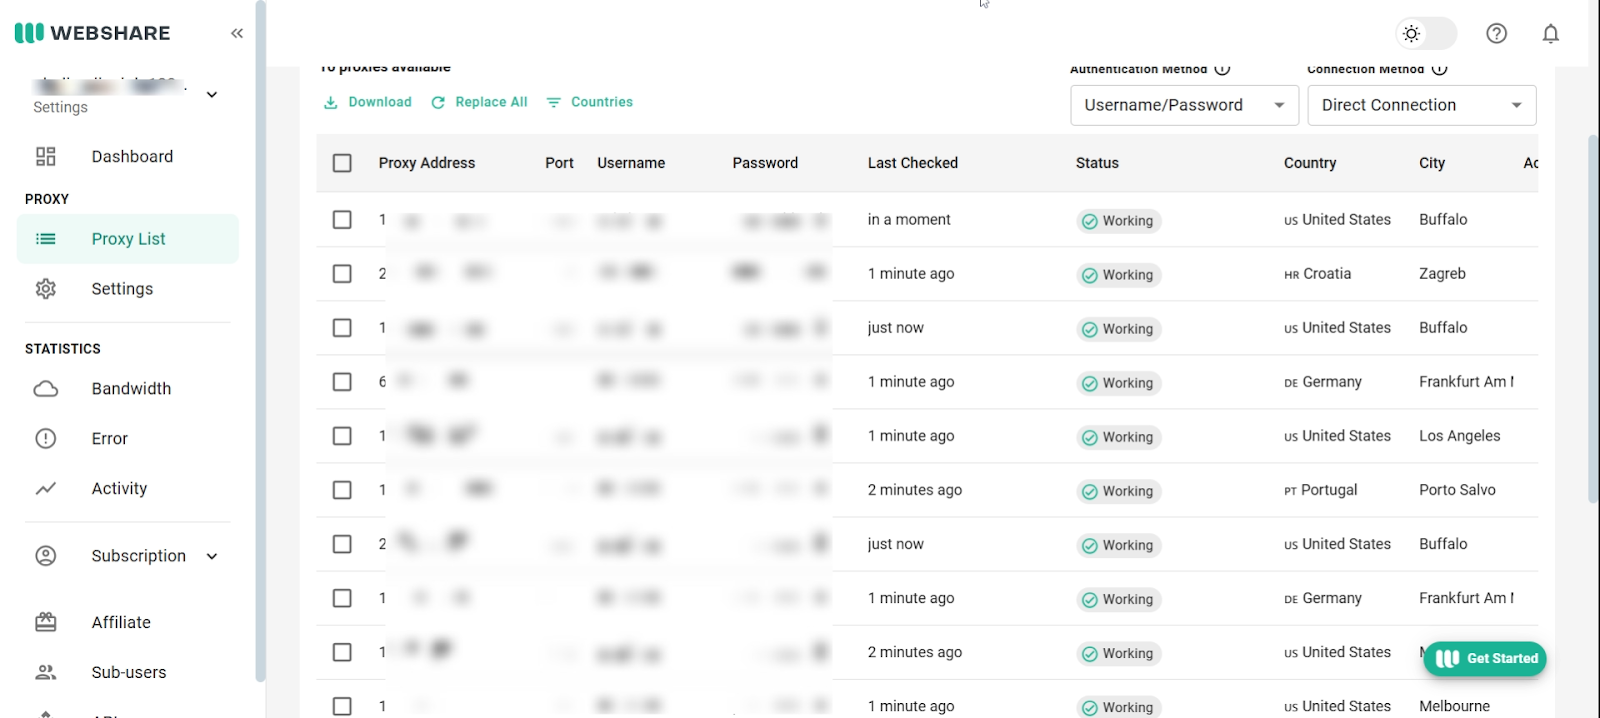
Each proxy entry includes an IP address, port number, username, and password—which are all required for this setup.
After selecting a proxy, enter the IP address, port number, username, and password into their respective fields in the Windows settings.

Then, check the confirmation box below and click Save to apply the changes. Your system will now begin routing traffic through the selected proxy.

Step 3: Verify Your Connection
To access Crunchyroll, you must confirm that your proxy is working correctly. You only need to open Google and search for “What is my IP address?” If your setup was successful, the displayed IP address should match the one from your selected proxy.
After this, you can watch your favorite Crunchyroll shows, without any region-specific restrictions.
Crunchyroll Proxy for Android Instructions
Depending on the make and model of your phone, configuring a proxy on an Android may vary slightly. However, the general steps remain the same across most Android versions. Here is how you can set up a proxy server on your device for a smooth Crunchyroll streaming experience:
Step 1: Access Your Wi-Fi Settings
Open the Settings app on your device and head to the Wi-Fi section. Connect to your preferred network, then tap the gear icon or settings button next to it.

You will see additional options; just locate and select Advanced Settings to proceed.

Step 2: Configure Your Proxy Manually
Within the Advanced Settings menu, locate the Proxy option. Tapping on it will reveal a dropdown menu with three options. Choose Manual to enable custom proxy settings.

Just as in the Windows setup, you must include the proxy details provided by Webshare. These details can easily be found on the Proxy List tab in your Webshare dashboard.
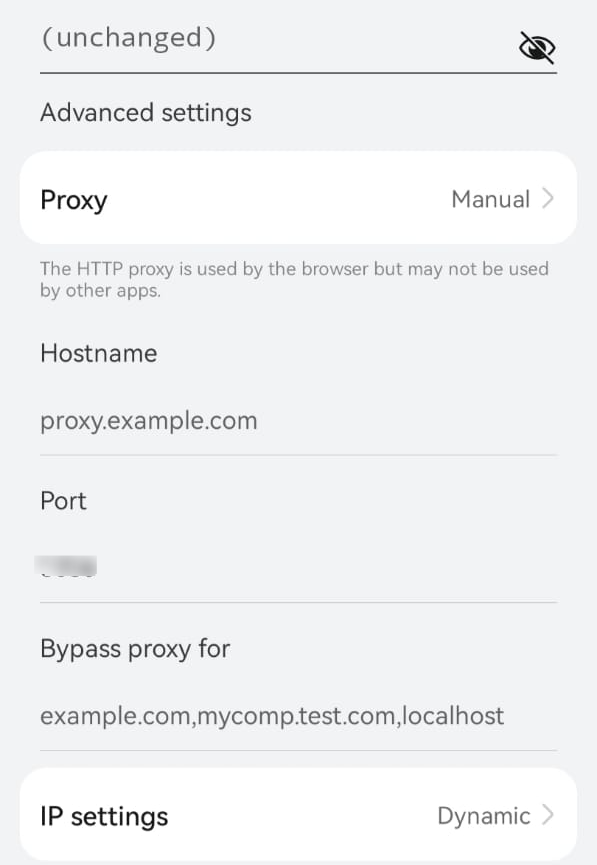
Input the IP address and port number into the respective fields and ensure accuracy before proceeding.
Step 3: Verify Your Proxy
Sometimes, the proxy needs to be verified before it becomes fully functional. Webshare offers two verification methods: Username/Password Verification and IP Verification.
For Username/Password verification, head to the Proxy List in your Webshare dashboard and retrieve the login credentials associated with your selected proxy. Enter the username and password when prompted.
For IP verification, whitelist the IP address of your device in your Webshare settings. This method allows you to use the proxy without manually entering login credentials. After a successful verification, your proxy should be active. Then, you can stream your favorite anime on Crunchyroll without restrictions.
How to Test Crunchyroll Proxy
A successful proxy configuration does not automatically mean your internet traffic is routed through the selected server. There is still a need for proper testing. This ensures that Crunchyroll recognizes your connection as coming from the intended region.
To verify your connection, open your browser and visit an IP-checking tool like IPinfo. On the results page, compare the displayed IP address, location, and ISP with the proxy details you chose in Webshare. If they match, then you are good to go!
To confirm if Crunchyroll recognizes your new location, ensure you clear your browser cache and cookies before accessing any previously unavailable content in your region. Then, you’re free to stream on Crunchyroll without limitations.
How to Turn Off Crunchyroll Proxy
If you are done with your Crunchyroll session or need to browse without a proxy for any reason, you can easily disable the proxy settings on your device. This is pretty straightforward and depends on your operating system.
To turn off the proxy in Windows, open Settings, navigate to Network & Internet, and then Proxy. Locate the Manual Proxy Setup, like we did in the Windows setup. Toggle off “Use a proxy server,” then click Save to apply the changes.
If you use a macOS, open your System Settings and head to Network. Select your active network connection and click Advanced.
Navigate to the Proxies tab and uncheck Web Proxy (HTTP) and Secure Web Proxy (HTTPS). Finally, click OK, then Apply to confirm the changes.
Conclusion
Voila! With just a few simple steps, you can now fully enjoy Crunchyroll without any region restrictions. Everything is now at your fingertips, whether it’s simulcasts or other classic favorites. Webshsre remains a top-tier option, especially as it offers 10 free proxies upon signing up—no credit card required.
Remember, proxies are not just for accessing restricted content. They also provide extra security by hiding your IP address and helping you browse safely across the web or other platforms. Now, you are all set up to securely explore Crunchyroll’s extensive library and beyond. Happy streaming!


