RoxyBrowser isolates every profile down to canvas hashes, WebGL rendering, fonts, and timezone data - but isolation only works if the network layer matches. If two profiles running different accounts connect from the same IP address, the platform doesn't need to fingerprint anything to notice they're related. This guide walks through connecting Webshare proxies to RoxyBrowser profile by profile, which proxy type actually fits multi-account work, and how Webshare's three connection methods change what you paste into RoxyBrowser's proxy fields.
Quick answer: Grab your proxy credentials from your Webshare dashboard, open RoxyBrowser's profile creation screen, click + Add under Proxies, and enter the protocol, host, port, username, and password. Which proxy type and connection method you use depends on whether the profile is a long-term account you're managing or a short-lived scraping task - covered section by section below.
Why profile isolation still needs a proxy
RoxyBrowser's core pitch is that every profile behaves like a separate device: its own cookies, its own session storage, its own randomized canvas and WebGL signatures. That handles how a single browser window presents itself to a website.
It says nothing about where the request came from. If Profile A (a client's Instagram account) and Profile B (a different client's Instagram account) both connect from your home IP, the platform can link them by network origin alone - no fingerprinting required. This is exactly why RoxyBrowser builds proxy assignment directly into profile creation, and why its own reviewers consistently flag proxy sourcing as the part that determines whether the setup actually holds up at scale.
RoxyBrowser does sell its own proxy option (branded RoxyIP, priced by bandwidth tier). It's a reasonable way to get started, but most teams running more than a handful of profiles end up pairing RoxyBrowser with a dedicated proxy provider instead - for broader country coverage, more predictable pricing at volume, and keeping proxy sourcing independent from the browser vendor.
Choosing a proxy type for multi-account work
Webshare offers three proxy products, and which one fits depends heavily on what the profile is actually doing - a persistent account you'll log into for months is a different problem than a profile you spin up once for a scrape.
Start free: Webshare's no-cost proxy tier
Before assigning real proxies to real profiles, it's worth testing the workflow on Webshare's free tier: 10 shared datacenter proxies and 1GB of bandwidth per month, no credit card required, and no expiration. Use it to confirm the profile-to-proxy binding works the way you expect before you commit paid ISP or residential proxies to profiles that matter.
Getting your Webshare proxy credentials
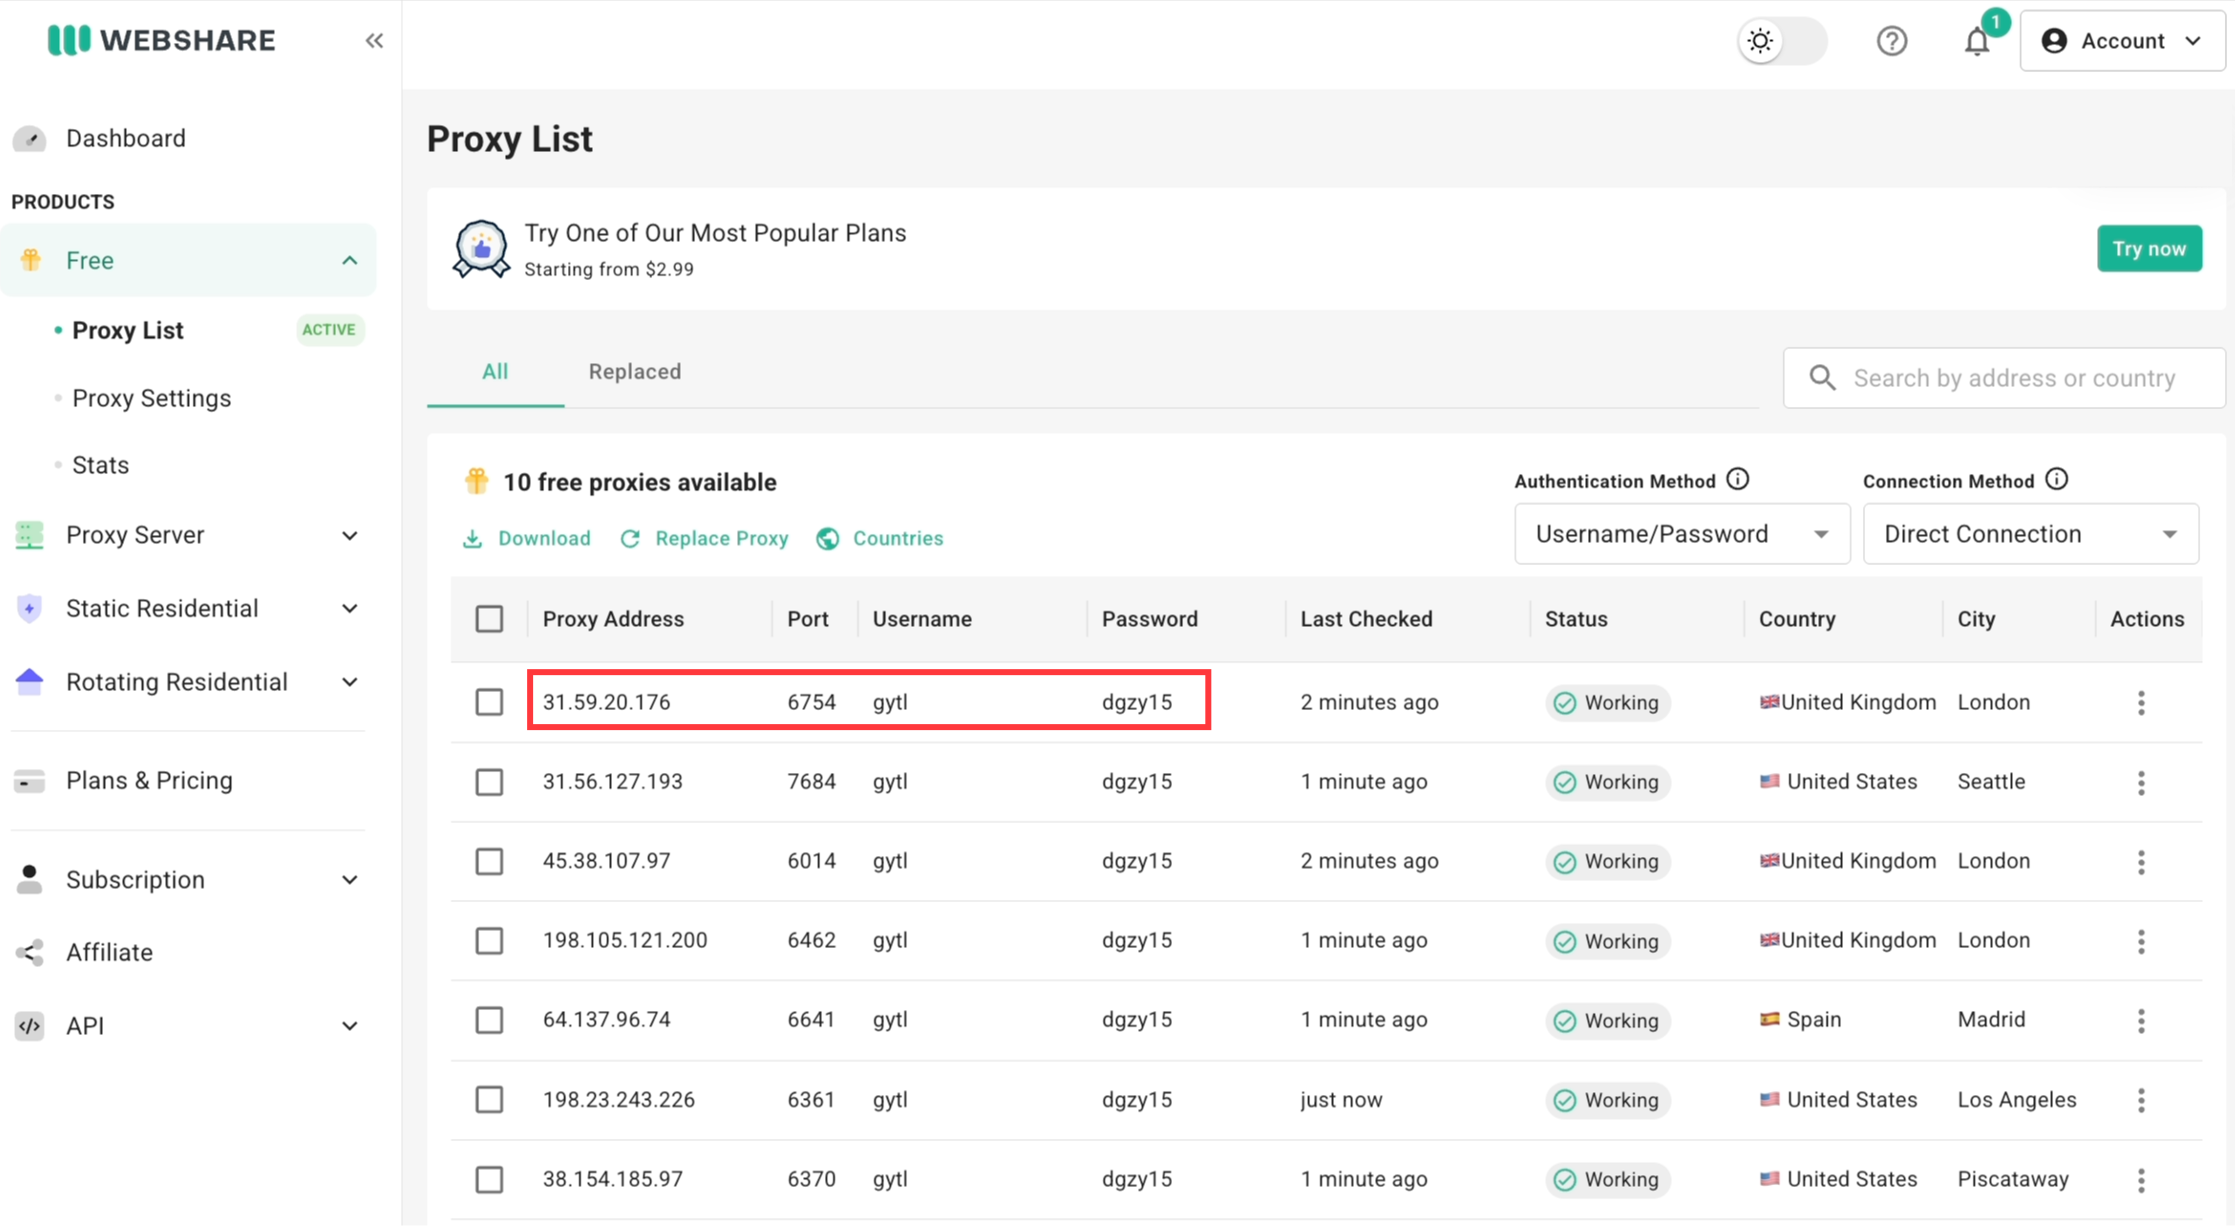
Once you're signed in, your proxy credentials live on the Proxy List page. You'll need a username, a password, and either a direct address (IP:port) or the backbone domain, depending on the connection method you choose in a later section.
Adding a proxy to a RoxyBrowser profile
Unlike code-based tools, RoxyBrowser's proxy setup happens entirely in its interface, one profile at a time.
1. Create a profile. Inside RoxyBrowser, go to the Profiles area, click Create Profile, stay on Create Single, and name it.
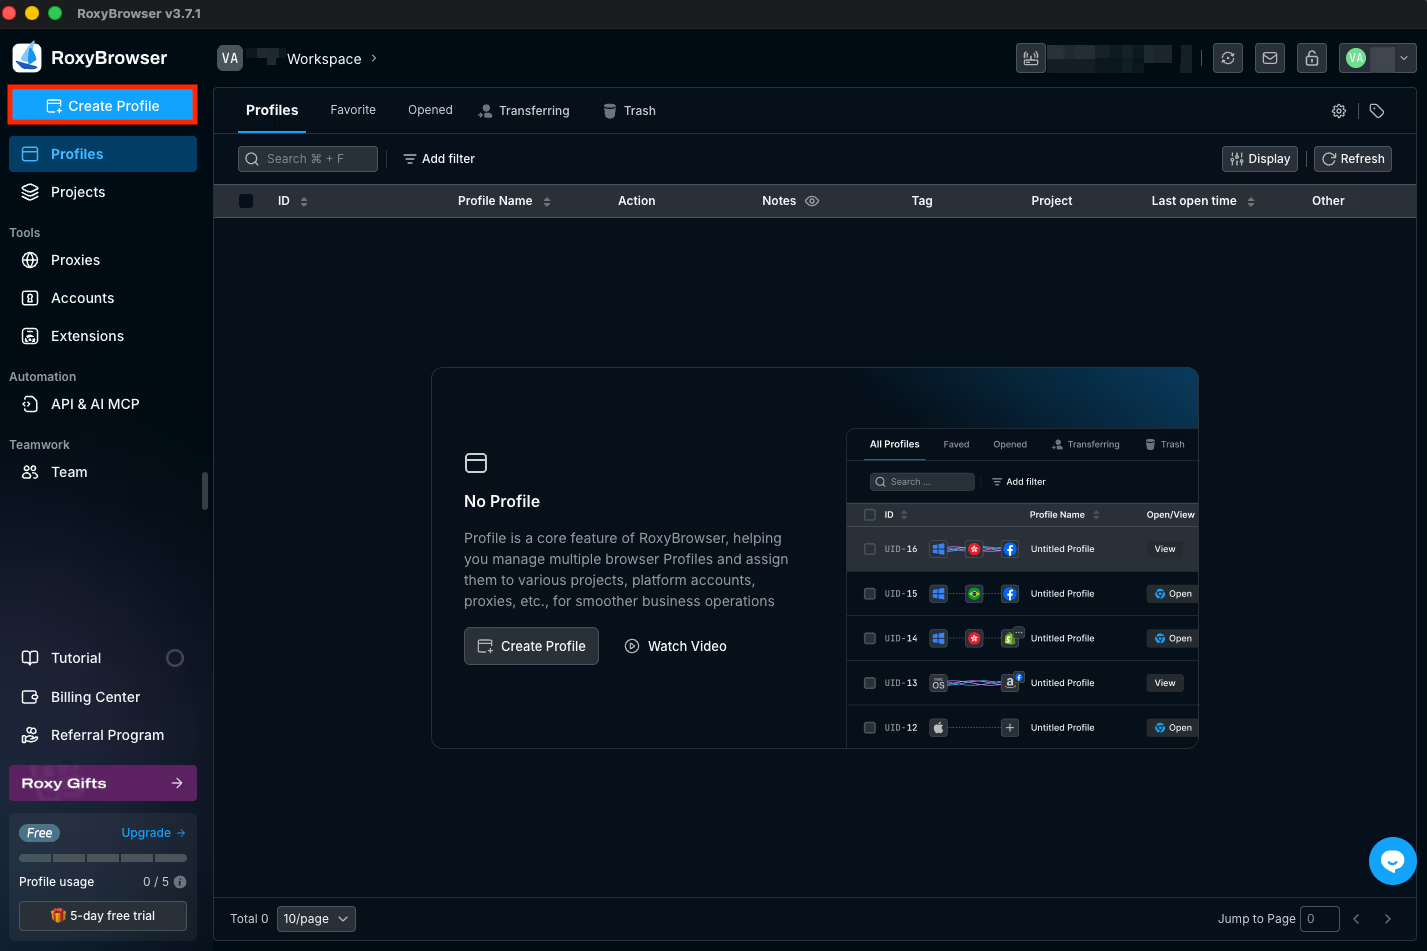
2. Open the Add Proxy window. Scroll to the Proxies section and click + Add.
3. Fill in your Webshare details. Choose the protocol (HTTP, HTTPS, or SOCKS5 - Webshare supports all three), then enter:
- Host/IP - your proxy address (see the connection methods section below for which one)
- Port - matching the connection method you picked
- Username - your Webshare username (with any targeting suffix, if using Backbone)
- Password - your Webshare password
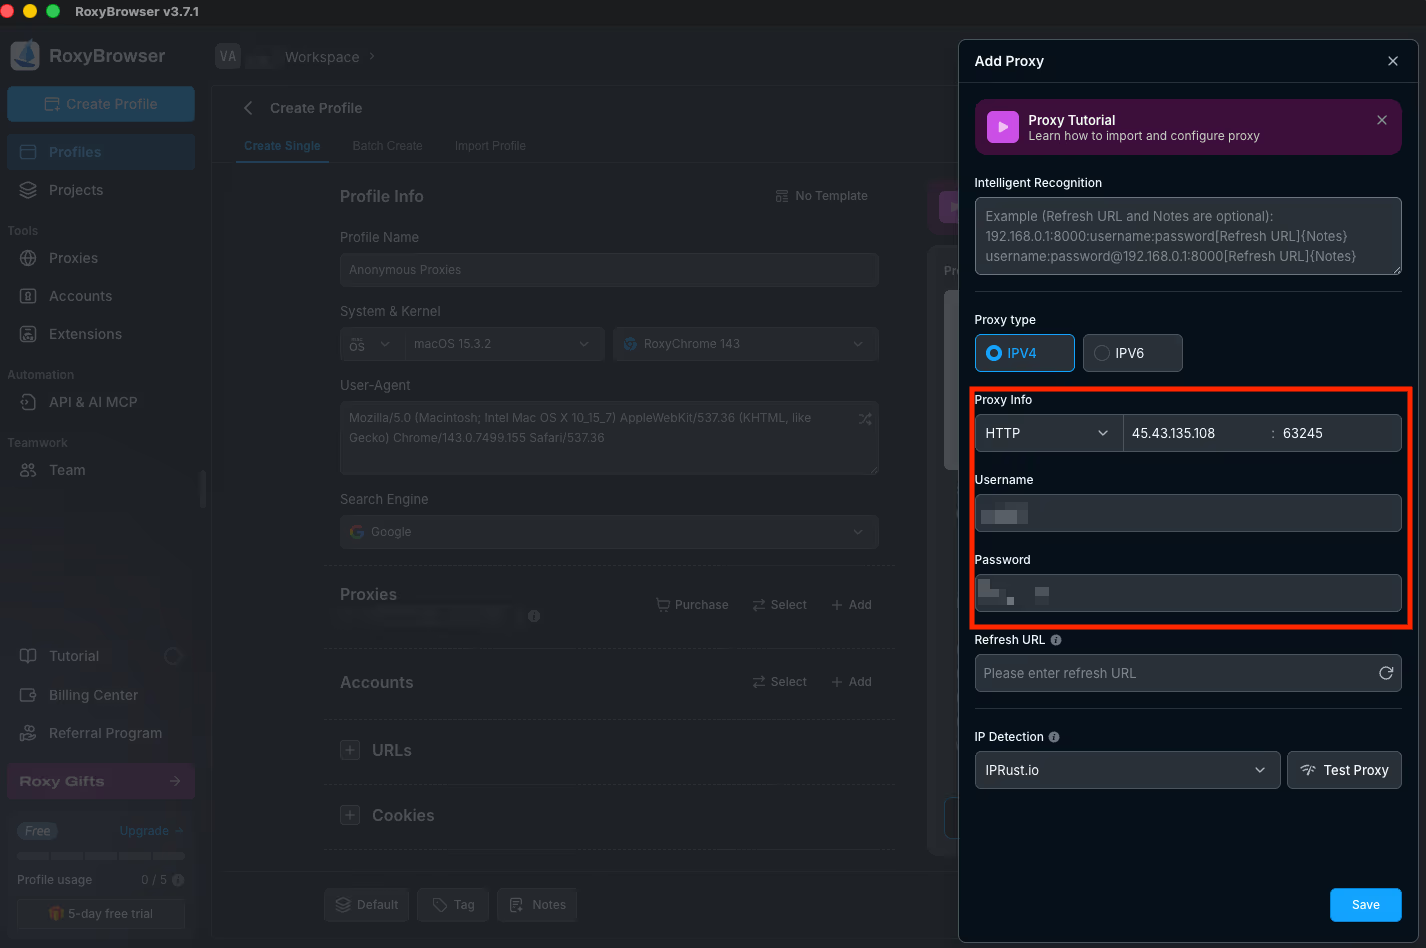
4. Test the proxy. Click Test Proxy. RoxyBrowser will confirm the connection and show the detected IP and location - if that location doesn't match what you expected, stop here and check your credentials before saving.
5. Save, then create the profile. Click Save in the proxy window, then Create Profile to finish. The profile now routes every request through that specific proxy.
Connection methods: Direct vs. Backbone vs. Rotating Endpoint
Webshare gives you three ways to connect, selectable from the Connection Method dropdown on the Proxy List page. Whichever you choose determines what you type into RoxyBrowser's Host/IP and Port fields.
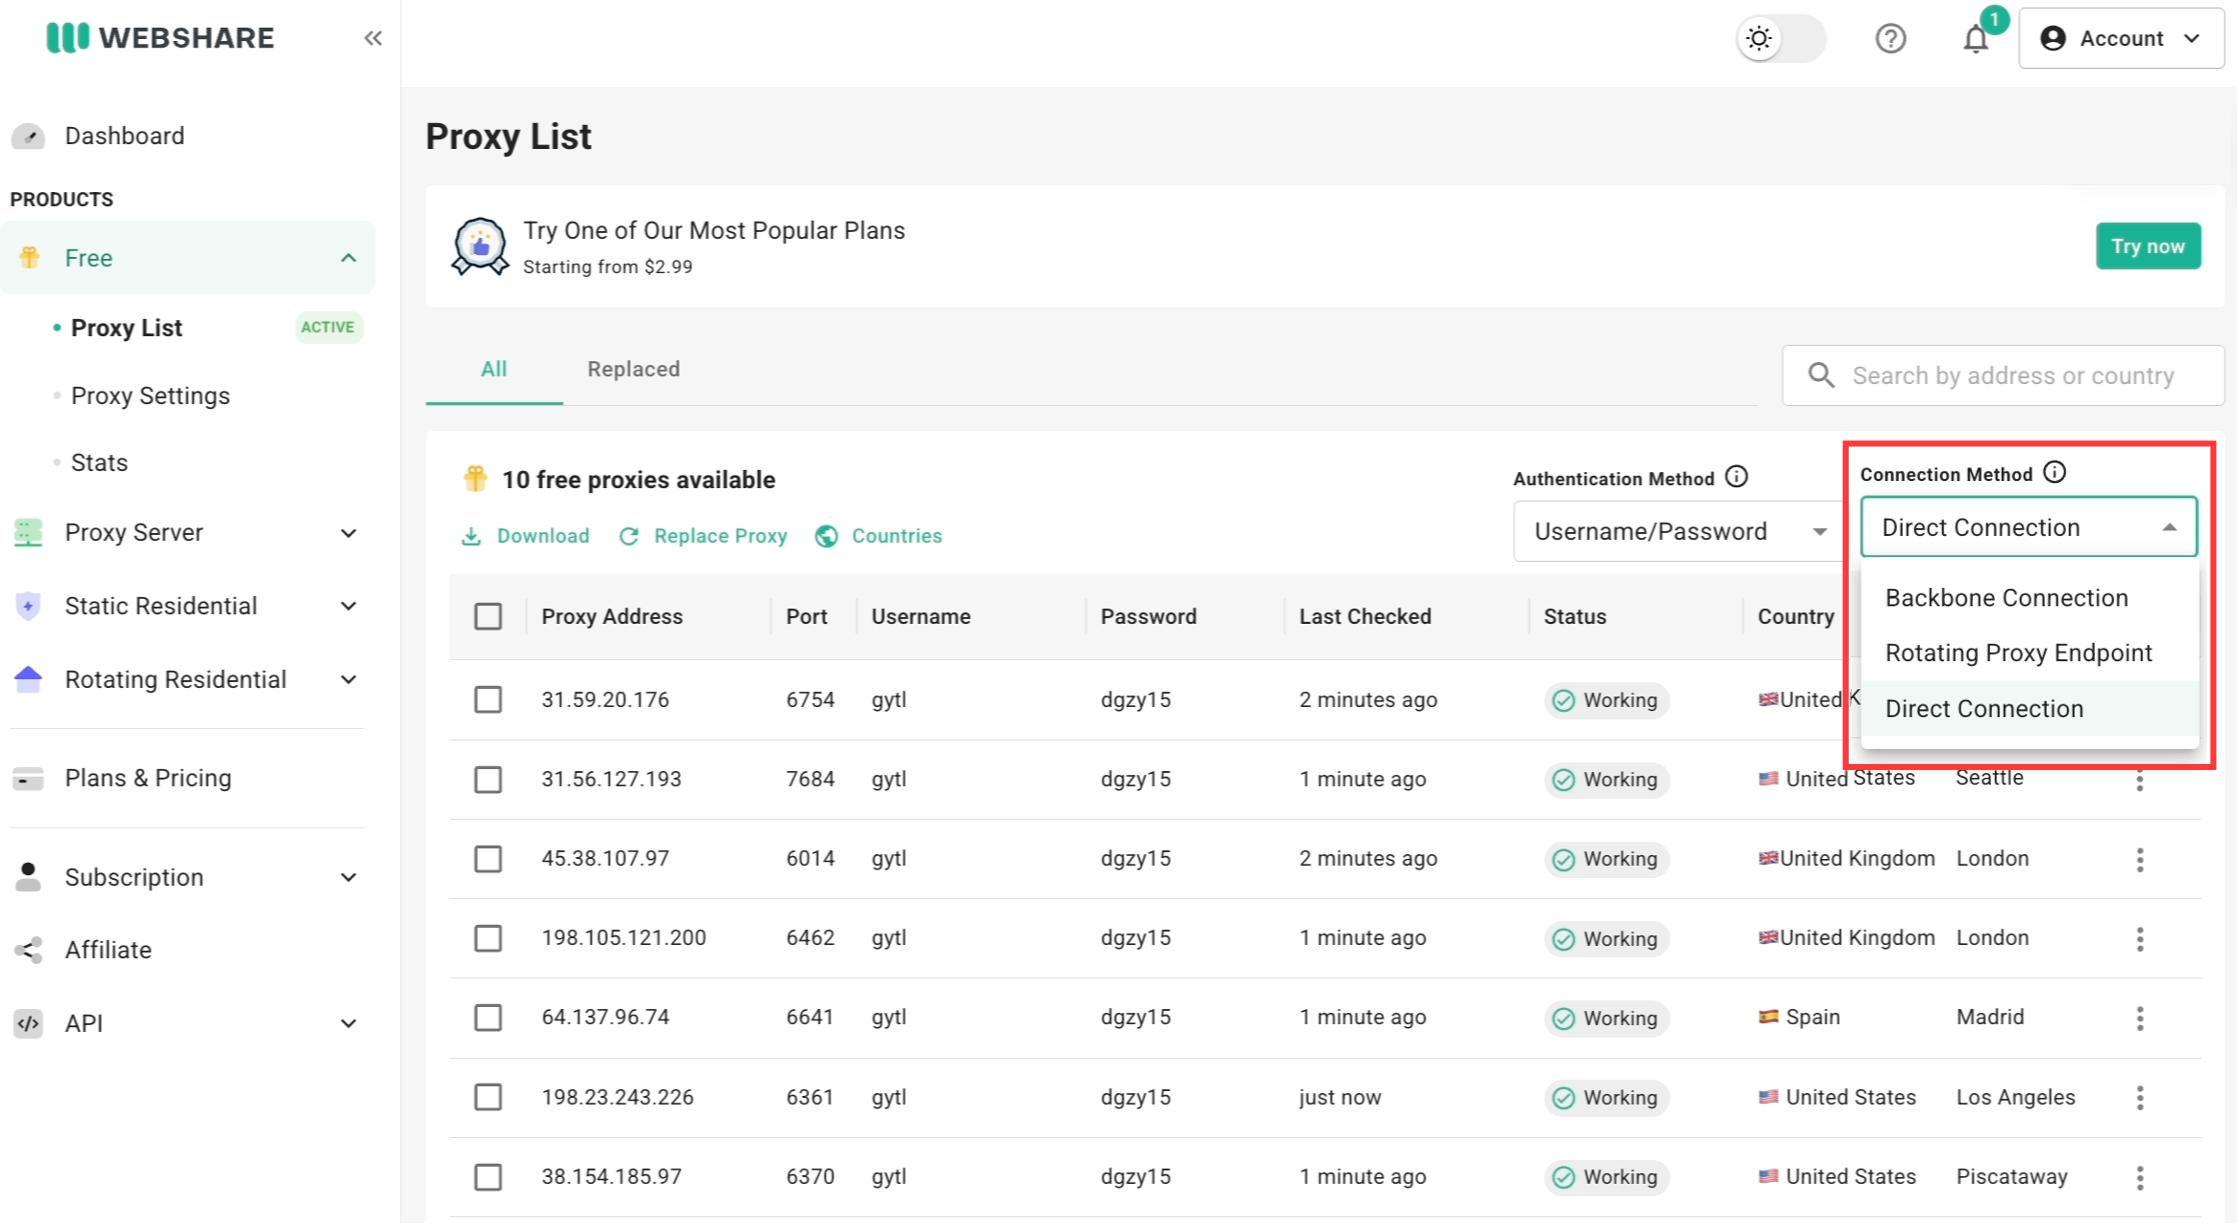
Direct Connection
Each proxy has its own fixed IP and port - a literal IP:PORT pair. In RoxyBrowser, this is the simplest pairing: one profile, one IP, permanently.
- Host/IP:
198.51.100.14(your proxy's address from the dashboard) - Port:
6060 - Username: your Webshare username
- Password: your Webshare password
Use Direct when a profile represents a persistent identity you're managing long-term - the IP never changes underneath the profile, which is exactly the behavior you want for an account you're logging into repeatedly.
Backbone Connection
Instead of a fixed IP, you connect through a single domain - p.webshare.io - and Webshare routes you to an IP behind the scenes. This is mandatory for Residential proxies (there's no fixed list to point at - you're drawing from an 80M+ pool) and optional for Datacenter and ISP. Backbone also unlocks username-string targeting: append country, city, and session parameters directly to your username, in the format {username}-{country_code}-{geo_params}-{session_id}.
- Host/IP:
p.webshare.io - Port:
80 - Username:
your_username-us-8841(a fixed session ID keeps the same IP - use this for a persistent profile drawing from the residential pool) - Password: your Webshare password
For a scraping-oriented profile where you want a new IP frequently instead, swap the session ID for -rotate:
- Username:
your_username-us-rotate
Supported ports for username/password authentication on Backbone: 80, 1080, 3128, and 9999-19999.
Rotating Proxy Endpoint
Different from Backbone - this rotates through the specific list of Datacenter or ISP proxies you already own, in random order, on every request. There's no domain-based pool involved, just your own purchased list, auto-shuffled. This isn't a fit for a persistent-identity profile (the IP won't stay put), but it's useful for a profile you're using to cycle through many low-stakes datacenter IPs quickly.
- Host/IP: copy the exact address shown on your dashboard - it can change, so don't reuse one from an old screenshot or a different article
- Port: shown alongside the address
- Username / Password: your Webshare credentials
Never reuse one IP across two profiles
This is the single most common mistake with any antidetect browser, and it defeats the entire point of profile isolation. If Profile A and Profile B are managing two different accounts on the same platform, they need two different IPs - full stop, regardless of how carefully you've randomized each profile's fingerprint.
In practice: with Direct Connection, assign a distinct static IP (Datacenter or ISP) to each profile - never point two profiles at the same IP:PORT pair. With Backbone, give each profile its own sticky session ID, since each unique session ID pulls a different IP from the pool. Either way, treat "one profile, one IP" as a hard rule, not a guideline.
Matching proxy type + connection method to your use case
Verifying your setup
RoxyBrowser's own Test Proxy button already confirms the connection works and shows the detected IP and location - that's your first check, and it happens before you even save the profile. It's worth a second pass, too: open the profile once it's created and confirm the fingerprint settings (timezone, language, geolocation) RoxyBrowser assigned to it actually match the proxy's real location, rather than just trusting that a successful connection test means everything lines up. A passing Test Proxy result confirms the proxy connects - it doesn't confirm your fingerprint settings agree with it.
Common issues and fixes
A target platform blocks p.webshare.io outright.Some sites block Webshare's shared Backbone domain specifically, rather than the IP behind it. Switch to the Gateway IP Address (available from the Backbone Connection view in your dashboard) - it behaves identically but presents as a plain IP instead of a domain. Keep the port at 80 when using it.
Test Proxy fails or times out.Almost always a protocol mismatch - confirm the Protocol dropdown in RoxyBrowser matches what you're actually connecting with (HTTP vs. SOCKS5), and double-check the port number matches your chosen connection method.
Two profiles ended up on the same IP by accident.This happens most often when duplicating a profile as a shortcut - the proxy assignment gets copied along with everything else. Check the Proxies section on any duplicated profile before using it, and assign a fresh IP or session ID.
Accounts still get flagged despite a successful Test Proxy.A green Test Proxy result only confirms the proxy works, not that your fingerprint and IP tell the same story. Check that the profile's timezone, language, and geolocation settings match the proxy's actual location, and confirm you haven't accidentally reused an IP across profiles (see above).