


Shopee is one of the top online shopping platforms in Southeast Asia. Since it was launched in 2015, it has quickly become popular with citizens in Southeast Asia countries like Singapore, Malaysia, Thailand, and so on. Recently, it has even expanded into Latin America. It has thousands of products, all available at affordable prices.
Shopee is known for being mobile-friendly, making it possible for buyers and sellers to connect quickly while on the move. However, some users might have issues connecting when they are in certain parts of the world. That is when using a proxy becomes important.
By serving as a middleman between your device and Shopee’s server, a proxy can help you overcome the challenges of regional restrictions, and even make your shopping experience smooth and safe. In this guide, you’ll learn how to use a proxy with Shopee.
Before Starting
In order to use a proxy with Shopee, you must first have a suitable proxy. You can get a suitable proxy by exploring reliable proxy providers like Webshare. A free proxy service, Webshare gives you up to 10 free proxies without asking you to connect your credit card. Also, they let you access premium functions without asking you to make any upgrades.
To start using free proxies from Webshare, you need to create an account with the platform. Visit the Webshare free proxy page and provide all the details required, then set up a username and password. Then, you’ll have access to your dashboard, which contains 10 free proxies you can use at your convenience.
Easiest Method: Shopee Proxy for Chrome
The easiest way to use a proxy with Shopee is to download a Webshare Chrome extension. This gives you seamless access to the proxy features while shopping. Here’s how to configure it:
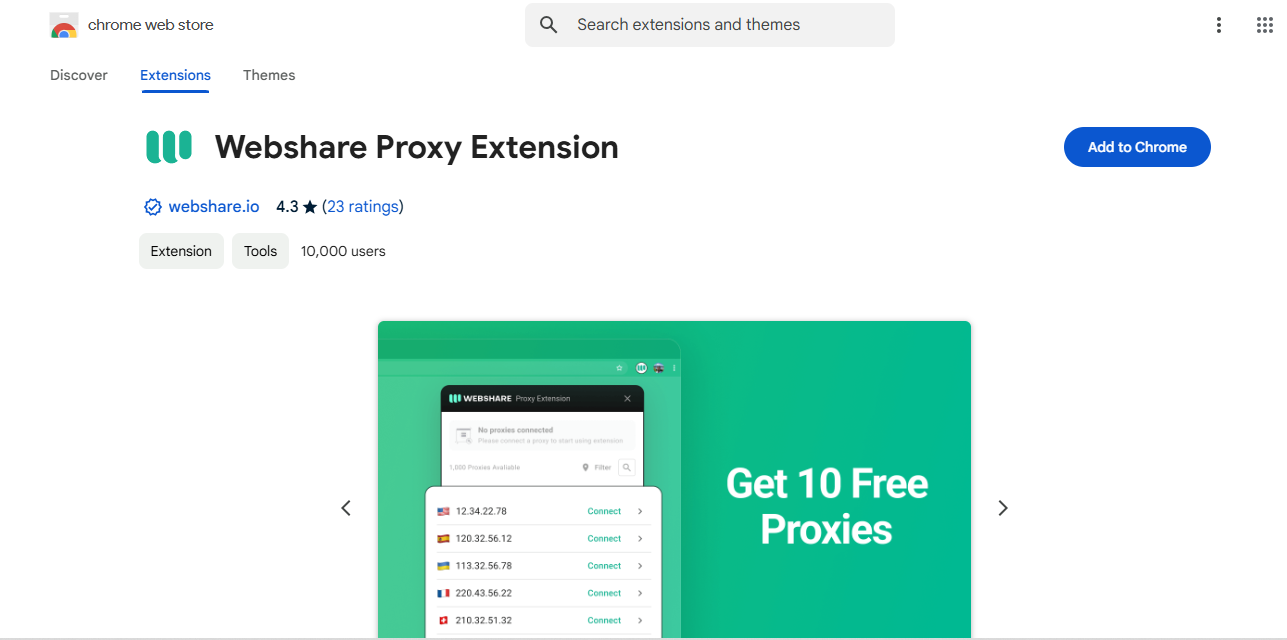
1. Install Chrome Proxy Extension
The first thing to do is to install a Webshare Chrome extension on your Chrome. This can be done by simply searching for ‘Webshare Proxy Extension’ in your Chrome Web Store. Then, you click ‘Add to Chrome’ and wait for it to download.
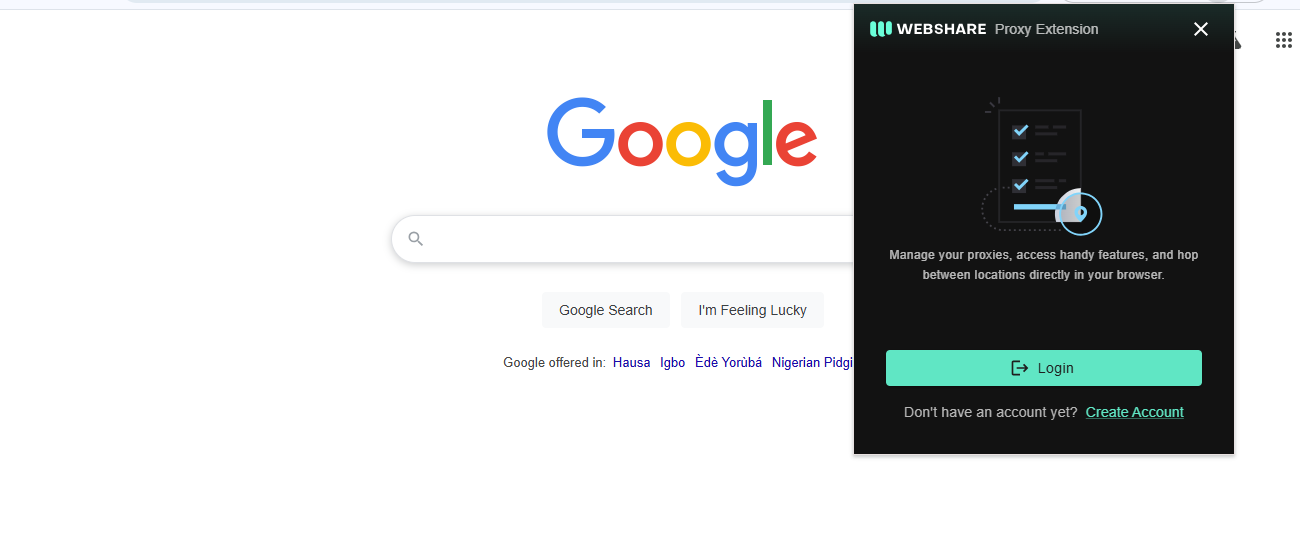
2. Configure Extension
To set up the downloaded Webshare extension, you’ll need to select the Webshare icon on your Chrome extension tray. This automatically takes you to a login page, where you’ll need to enter your login details. Once in, you can open your dashboard and select the proxy you want to use. Finally, click save.
3. Activate Proxy Connection
After setting up your proxy, select the extension icon on again and click ‘Connect’. Confirm that your proxy is working well by visiting Shopee.

Shopee Proxy for Windows Instructions
There’s also the option of configuring your proxy on your Windows system directly. Here’s how to do this:
1. Open Proxy Settings
The first step is to open your Windows proxy settings. You can do this by going to your Windows Settings page (press the Windows button + I) and navigating to ‘Network & Internet’. Here, click ‘Proxy’ to open its settings. Or you can simply search ‘Proxy Settings’ in your Windows search bar.

2. Configure Windows Proxy Settings
As soon as your Proxy settings is opened, you’ll see the option to choose between Automatic Proxy Setup and Manual Proxy Setup. Choose the Manual option.
If, on the other hand, you choose the manual option, you’ll need a specific IP address and port number. Here’s what to do:
- First, click ‘Setup’ to open the configuration window.
- Here, switch the ‘Use a proxy server’ button to On
- Next, key in the proxy server address and port from your Webshare dashboard
- You can also enter the addresses you want to be able to visit without a proxy in the ‘Use the proxy server except for addresses that start with the following entries’ box.
- Finally, click Save to update your settings.

Shopee Proxy for Android Instructions
If you prefer to shop on your mobile device, here are the steps to follow to use your Webshare proxy on Android:
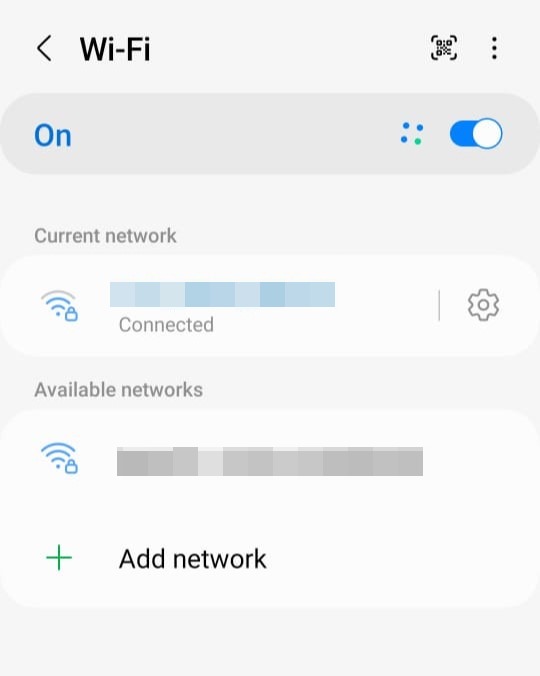
1. Open Wi-Fi Settings
First, go to the Wi-Fi settings on your device and connect to the network you want to use for the proxy. After that, click the settings icon beside the Wi-Fi name to start the configuration. In some devices, you might simply need to click the Wi-Fi name to access its settings.
2. Configure Settings
Next, find the ‘Advanced Settings’ option. When you click this, you’ll see a drop-down menu. Click Proxy here to open Proxy settings.
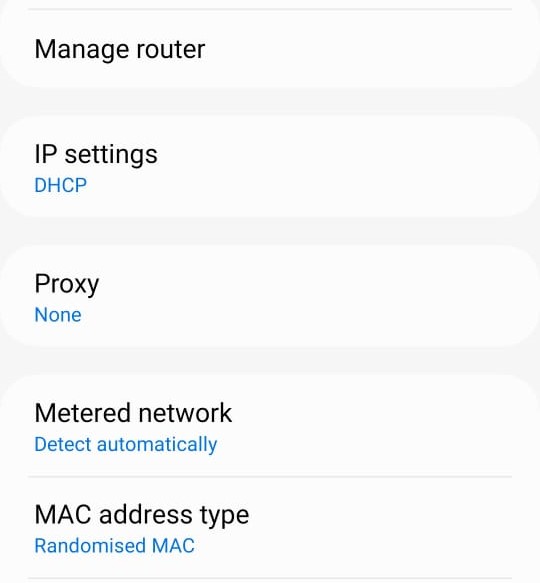

Then, select ‘Manual’ and input the hostname and port of your Webshare proxy. These are usually available on your Webshare dashboard.
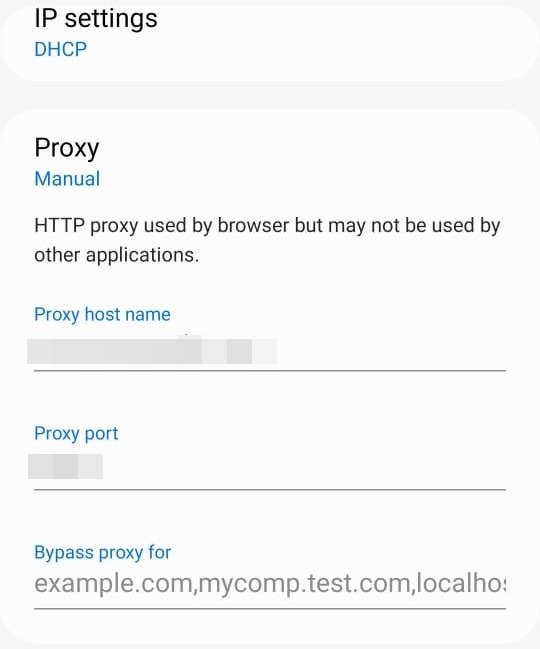
Finally, click ‘Save’ to update changes.
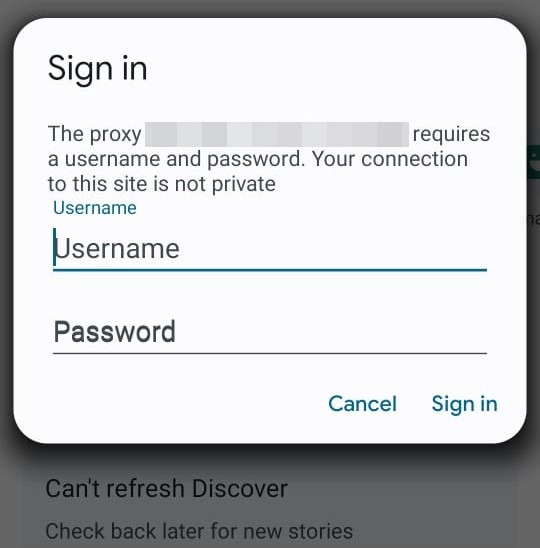
3. Authenticate Proxy
The final step is to select an authentication option. For this, go to your Webshare dashboard and open the proxy list page. There are two options to choose from: ‘Username/Password’ and ‘IP Authentication’.
Choosing the Username/Password option means you’ll need to authenticate your proxy by entering the proxy’s username and password.
How to Test Shopee Proxy?
After configuring your Shopee proxy, you need to make sure that it’s working as it should. You can do this by connecting your proxy and opening WhatIsMyIPAdress.com to view your proxy's IP address. You can confirm that it’s working well by visiting Shopee while your proxy is still connected.
How to Turn Off Shopee Proxy?
When you no longer need the Shopee proxy, you can turn it off by following these steps:
- Chrome: Click the Webshare extension icon on your Chrome extension tray, and then click ‘Disconnect’.
- Windows: Open the Proxy settings and turn off the ‘Use a proxy server’. Next, click Save.
- Android: For your Android device, you can turn off the proxy by going to Proxy settings under your Wi-Fi settings. And then, under Proxy settings, click change from ‘Manual’ to ‘None’ and save changes.
-fotor-bg-remover-20250204113548.png)


