


When it comes to setting up a proxy in Google Chrome, there is a standard manual method available, but the easiest and most efficient way is through the Webshare Chrome extension. This extension simplifies the process, allowing users to configure and manage proxies with just a few clicks. In this guide, we’ll first introduce you to the Webshare Chrome extension as the quickest way to get started, followed by a detailed walkthrough of the standard method for manually configuring proxies in Chrome.
How to change proxy settings using the Webshare Chrome extension
Setting up a Chrome proxy via Webshare extension will take a few simple steps:
1. Install the Webshare Chrome extension
To begin, head over to the Webshare Browser Extension on the Chrome Web Store. Once you're there, simply click on Add to Chrome, and when prompted, confirm by selecting Add Extension.

2. Make the extension visible
If you don’t see the Webshare extension icon in your browser toolbar right away, don’t worry! It’s probably hidden. To make it visible, go to the top right corner of your browser and click the Extensions button (located next to your profile picture). Find the Webshare extension and click the pin icon beside it. This will ensure the extension appears in your toolbar for easy access.
3. Create a new account
Once the extension is visible, click the Webshare logo to get started. If you already have an account, choose Login. If you’re new to Webshare, select Create Account. You can register with your email and password, or if you prefer, connect using your Google account.
4. Connect to a proxy
After logging in, you’ll see a message at the top saying “No proxies connected”. This means you haven’t connected to a proxy yet.
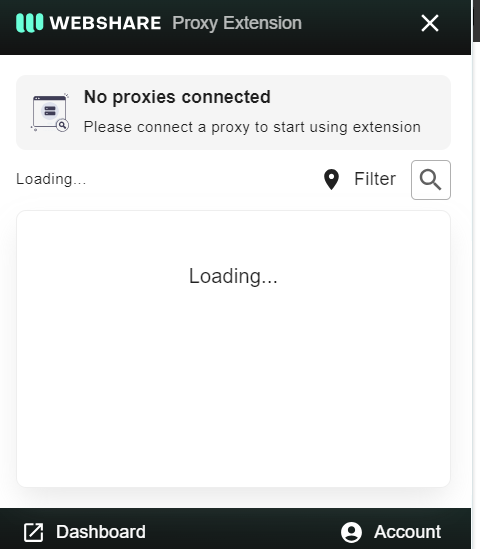
If you're a new user, you’ll find a list of 10 free proxies with flags and IP addresses indicating their geographic location. Simply click Connect next to the IP address of the proxy you want to use, and you’ll be instantly connected.

5. Filter proxies by country
For better control over your connection, you can filter proxies based on their country or IP address. Just click Filter in the top right corner to refine your list and find the best proxy for your needs.
6. Check connection status
Once connected, you’ll see the proxy details at the top of the extension. You can easily switch between proxies or disconnect whenever you like. A green dot on the Webshare extension icon in your browser toolbar indicates your proxy is working correctly.

If you see a red dot instead, it means there’s a connection issue. Simply disconnect and reconnect to resolve it.
How to manually configure Chrome proxy settings
You can configure Chrome to use a proxy through your system’s network settings by following these steps.
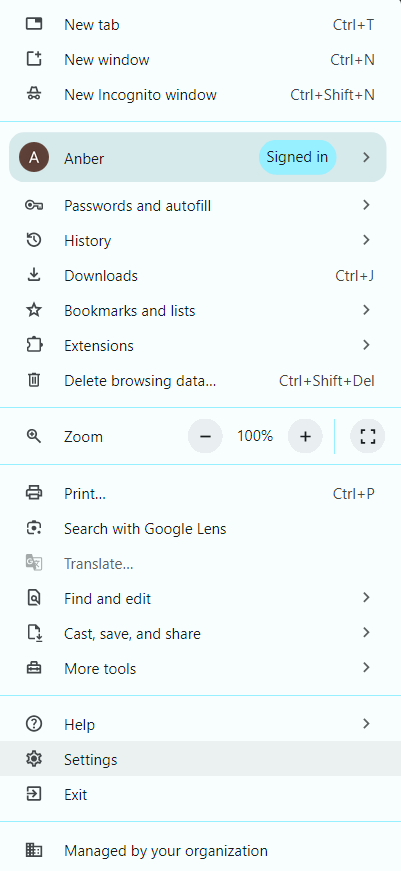
1. Open Chrome settings
Start by clicking the three dots in the top-right corner of your Chrome browser and selecting Settings from the dropdown.
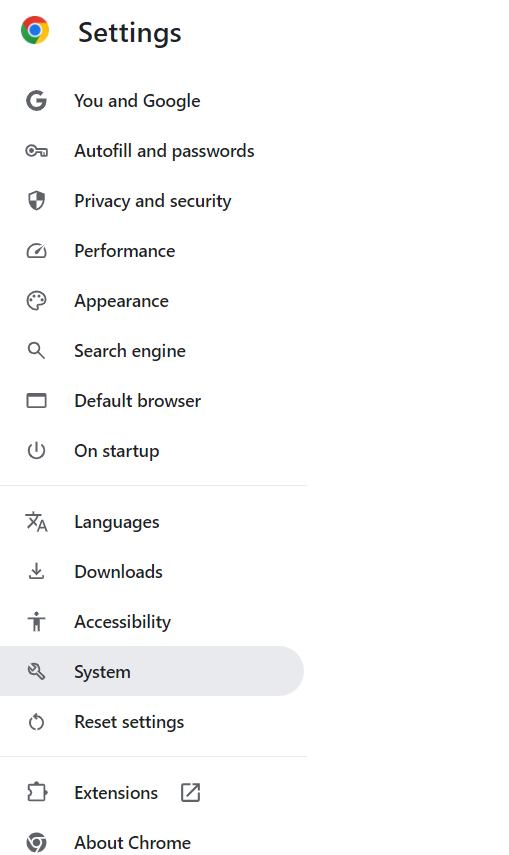
2. Open System proxy settings
In the System section, click on Open your computer’s proxy settings. This will open the network settings window for your operating system (Windows or macOS).
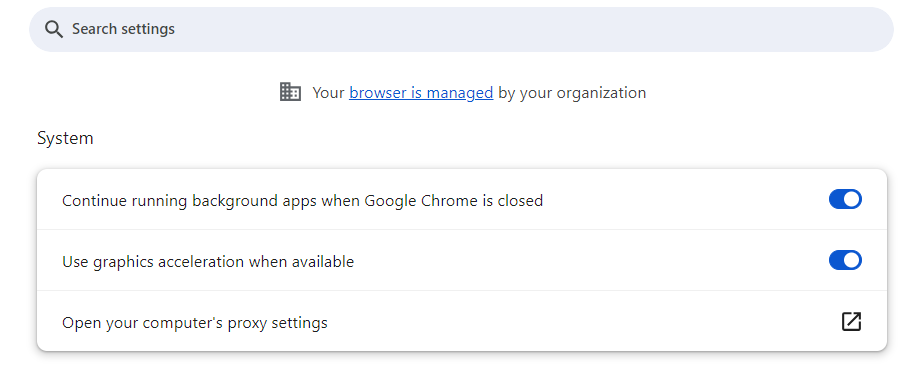
3. Enable proxy server
Once in your system’s proxy settings, toggle on the option labeled Use a Proxy Server.
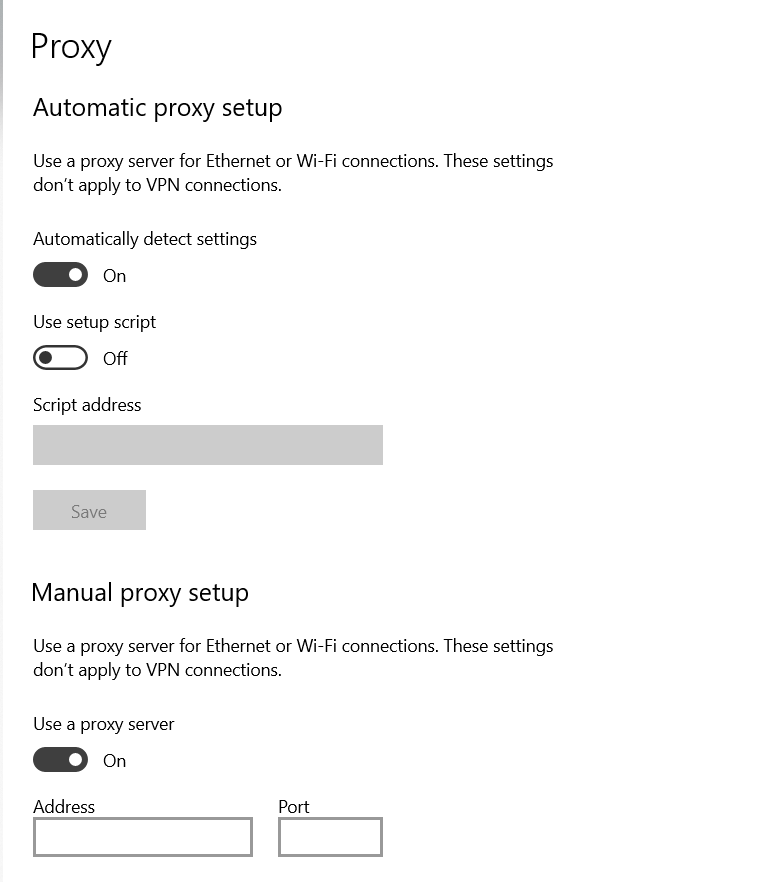
4. Enter proxy information
You’ll be prompted to input the IP address and port number of your proxy server. You can find your proxy server details (IP address and port) in your Webshare account after signing up for their free proxies. Once you enter the required information, click Save to apply the changes.
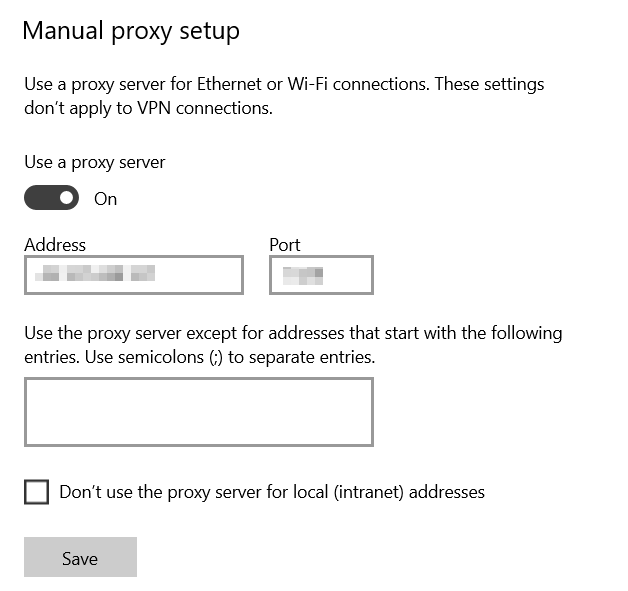
5. Manage proxy authentication
If your proxy requires a username and password, you’ll be prompted to enter these credentials when you start using the browser with the proxy enabled.
6. Disable or Change the proxy
To turn off the proxy, return to the system proxy settings and switch off Use a Proxy Server. If you need to switch to a different proxy, simply repeat the steps, entering the new IP address and port.
Wrapping Up: Configuring proxy settings in Chrome browser
We first covered how to set up a proxy using the Webshare Chrome Extension, providing new users with an easy way to get started, including access to 10 free proxies and 1 GB of monthly bandwidth. The extension streamlines proxy management, allowing seamless geo-location changes, easy IP switching, and enhanced privacy. Additionally, we discussed the manual method for configuring a proxy in Chrome for those who prefer that approach.


